Surprise! You Died… Again.
The Souls games are revered, and notorious, for their punishing difficulty. One of the hardest aspects of the series is the intimidating bosses players must face throughout their journey. In a prior piece, we covered the biggest and baddest of Demon’s Souls. Today marks our next entry: Dark Souls bosses ranked by difficulty.
Specifically, we’ll be delving into Dark Souls: Prepare To Die Edition. This version includes the base game plus the Artorias of the Abyss DLC, which means even more bosses to rank. There were 26 foes to consider, and each one can be challenging in its own way. (This is Dark Souls, after all.) However, not all bosses are created equal.
Want to hop to a specific boss? Here’s a handy cheat sheet (in alphabetical order):
- Asylum Demon
- The Bed of Chaos
- Bell Gargoyle
- Black Dragon Kalameet
- Capra Demon
- Ceaseless Discharge
- Centipede Demon
- Chaos Witch Quelaag
- Crossbreed Priscilla
- Dark Sun Gwyndolin
- Demon Firesage
- Four Kings
- Gaping Dragon
- Gravelord Nito
- Great Grey Wolf Sif
- Gwyn, Lord of Cinder
- Iron Golem
- Knight Artorias
- Manus, Father of the Abyss
- Moonlight Butterfly
- Ornstein and Smough
- Pinwheel
- Sanctuary Guardian
- Seath the Scaleless
- Stray Demon
- Taurus Demon
Now, let’s get on to the list.
26. Pinwheel
It’ll be over before you know it.
Pinwheel is the boss of the catacombs, and not much of a challenge. That’s because it just doesn’t have a lot of health. But Pinwheel makes up for this by creating copies of itself to try and confuse you. (You may find that the fight against Pinwheel is similar to the fight against the Poe sister Meg from The Legend of Zelda: Ocarina of Time.)
The challenge of this fight comes from the initial fall damage the player will take from dropping into the boss arena. Pinwheel is beaten easily if you’re fast and aggressive due to its low health. However, because of the fall damage, players will want to heal, giving Pinwheel time to start creating clones. It and its clones will spend most of their time floating around the room shooting fireballs, which do a fair bit of damage but are relatively easy to dodge.
Even with the clones, Pinwheel is not difficult to spot among his copies. Once found, it’ll likely die to a quick flurry of your attacks.
25. Asylum Demon
Welcome to Dark Souls.
The Asylum Demon is the first boss players will encounter on their journey through Lordran, and he’s also the easiest. Initially, you’ll find yourself face to face with this hulking monstrosity without any gear besides armor and a broken sword. At this point, the boss is nearly unbeatable as the broken sword does no damage to it.
Instead, look for a door on the left side of the arena and use it to avoid the boss and continue progressing through the undead asylum. After continuing through the area and obtaining a proper weapon, you’ll come to a fog wall, which in the Dark Souls world often indicates a boss fight.
Once through the fog gate, players will encounter the Asylum Demon again. However, this time they’re on a balcony positioned right above the boss’s head. Players can then jump and plunge their weapon right into the demon, taking away two thirds of his health bar. Starting the battle like this gives you a huge advantage against the boss.
The fight itself is very easy. The demon has very slow weapon strikes, each of which are well-telegraphed and easy to space around or dodge. His attacks don’t deal a ton of damage, and the demon leaves plenty of time for you to heal. If you’re able to get behind the demon, he’ll have trouble landing hits, making the fight even easier.

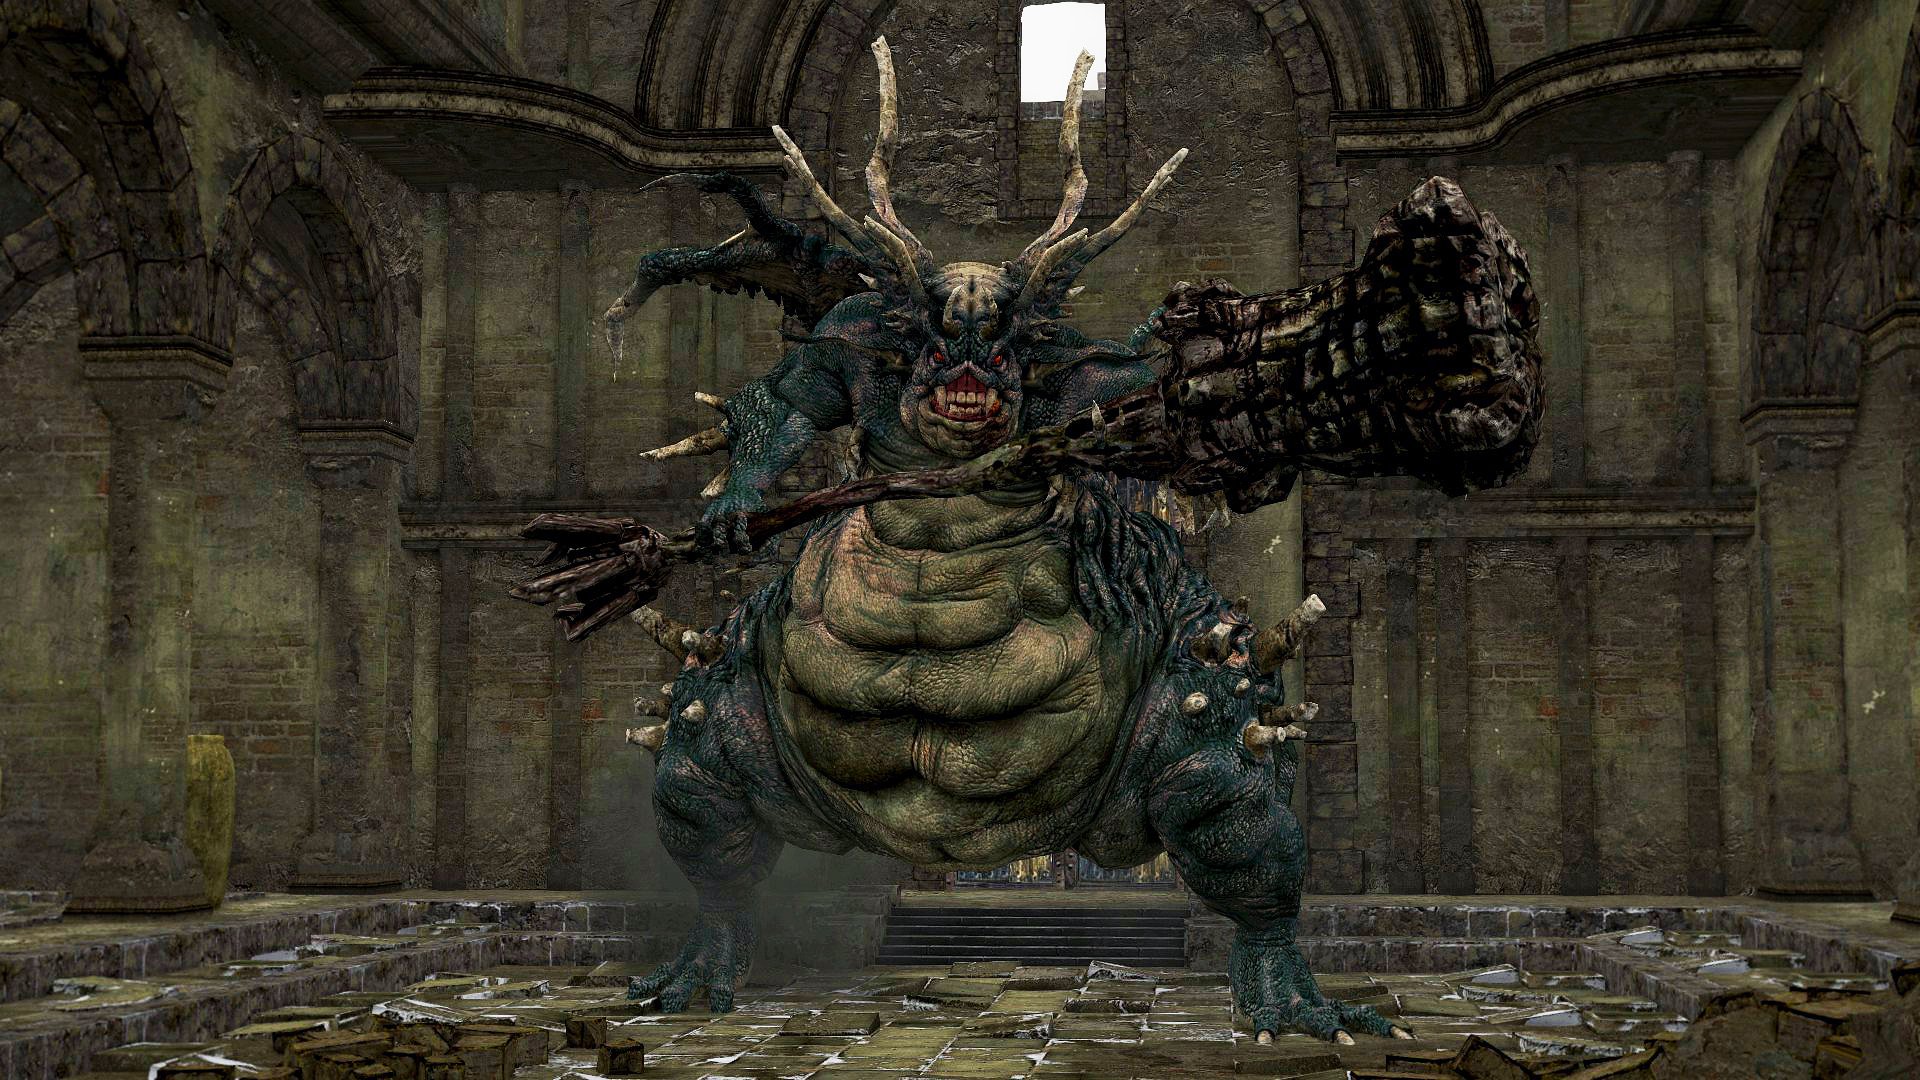
24. Gaping Dragon
I can see where its name comes from.
The Gaping Dragon is the boss of the Depths. His introduction is extremely intimidating but the boss is all bark and no bite. The dragon’s extremely slow and will walk forward to try and slam it’s giant mouth into the player. After slamming its mouth down, its head will be open to a couple of attacks. It’ll then charge forward to try and trample the player.
This is the most common attack cycle you’ll see from the Gaping Dragon. It does have a couple other attacks but they’re all slow and predictable. Granted, if you’re hit by the attacks, they’ll do a lot of damage. But you have plenty of time to heal, and the chance of you getting hit is slim unless you get reckless.
The Gaping Dragon does have a lot of health compared to the other bosses the player has faced thus far, but with enough patience it will fall.
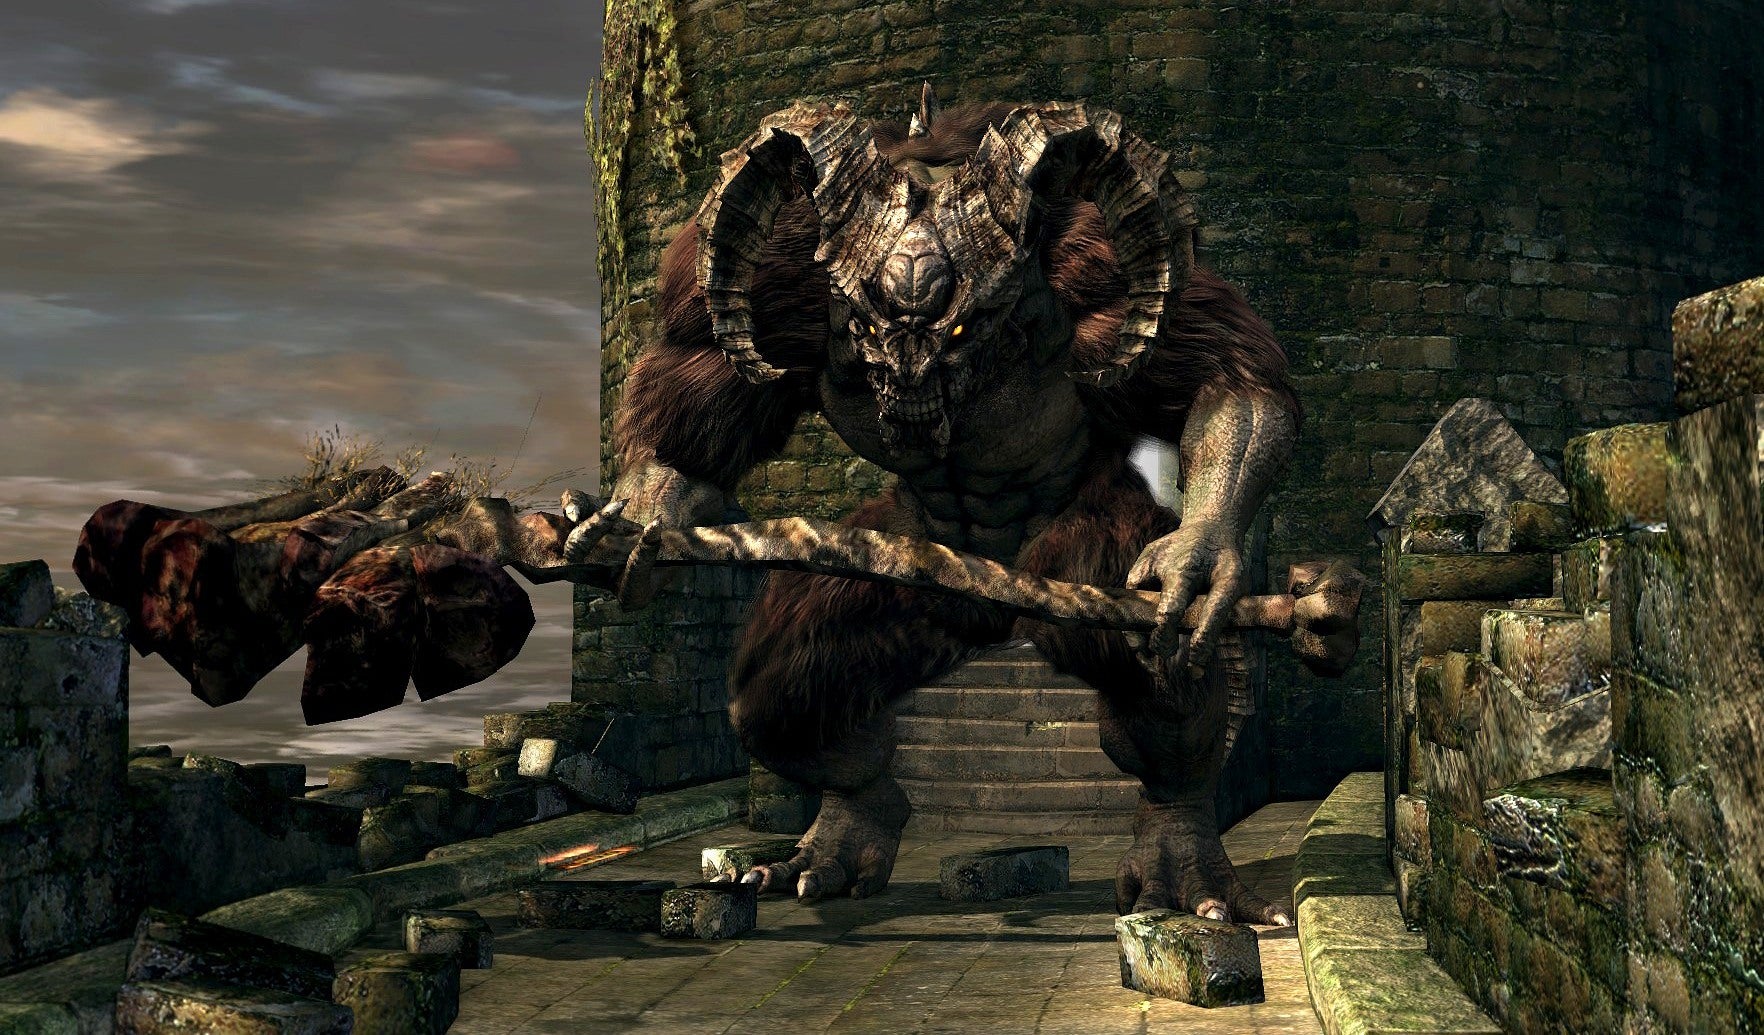
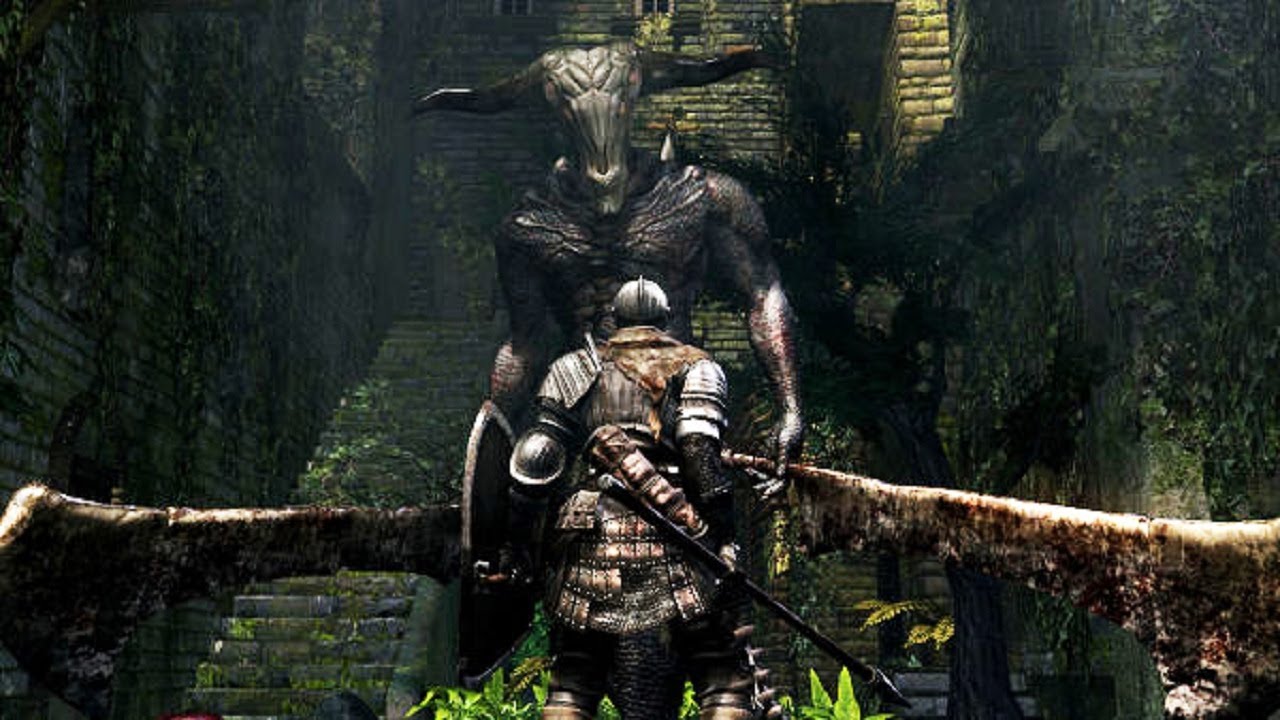
23. Taurus Demon
The first real boss.
The Taurus Demon is most likely the second boss players will face in their playthrough. It’s fought on a very narrow bridge in Undead Burg. There’s a ladder near the entrance to the arena that brings the player up to a platform positioned above the bridge. The use of this platform is key. As soon as the boss appears, you can run back to the ladder, climb up to the platform, and wait for the demon to walk beneath it for a chance at a plunging attack. After getting the jump on the demon, it’s possible to climb the ladder and plunge again. But this is hard, as the Taurus Demon might not let you climb up easily a second time.
Standing your ground against the Taurus Demon isn’t too tough. What is difficult is that lack of area to move around. The trick is to bait one of the demon’s slow axe swings, back away to avoid the attack, then move in for a couple hits. If you explored The Undead Burg thoroughly, you might have found the Gold Pine Resin item. Throw that on your weapon and you’ll slice through this demon like butter.
Rinse and repeat, and the second boss of the game will fall at your feet.
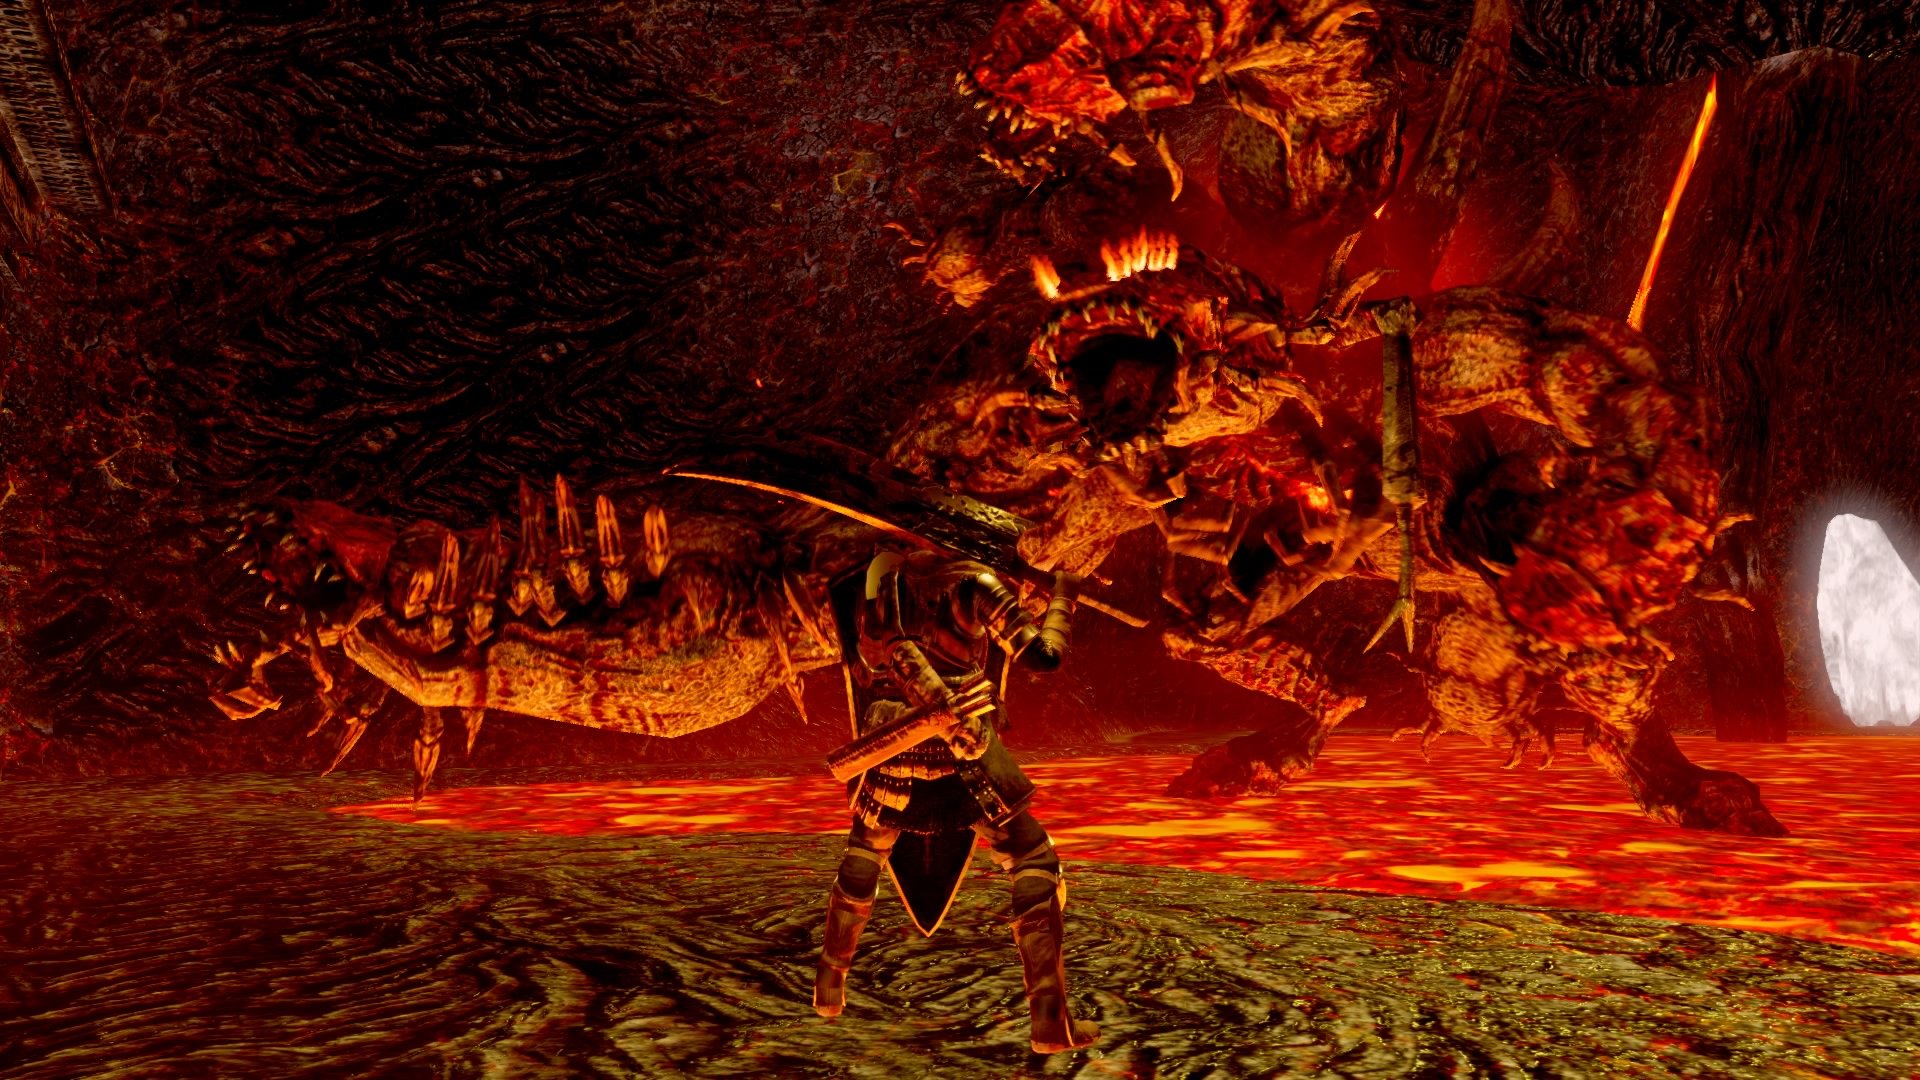
22. Ceaseless Discharge
Being big is all he’s got.
This hulking monstrosity might be the biggest boss in the game. When fighting him, you’re on a cliff just level with his face while the rest of his body stands in the lava below you.
Ceaseless Discharge is passive at first and will not attack the player until they pick up the Gold-Hemmed Black Set on the body the boss is guarding. According to Dark Souls lore, the dead body and armor set belong to one of Ceaseless Discharge’s sisters, one of the Witches of Chaos.
There are multiple ways to go about fighting this boss. The easiest way is to lure Ceaseless Discharge back to the entrance of the arena where you’ll notice the ground that the boss stands on doesn’t reach. Because of the lack of footing, Ceaseless Discharge will jump over in pursuit of the player and hang off the edge of the cliff. All you have to do at this point is smack the arm the boss is using to hang onto the cliff a few times, and he’ll fall to his death.
Using this method makes this fight the easiest in the game, so we’ll rank it a bit more fairly. Even when standing your ground against this grotesque monster he’s not all that hard. His attacks are slow and hit hard, but there are plenty of windows to heal. So it becomes more a test of how many Estus Flasks you bring than an actual challenge.
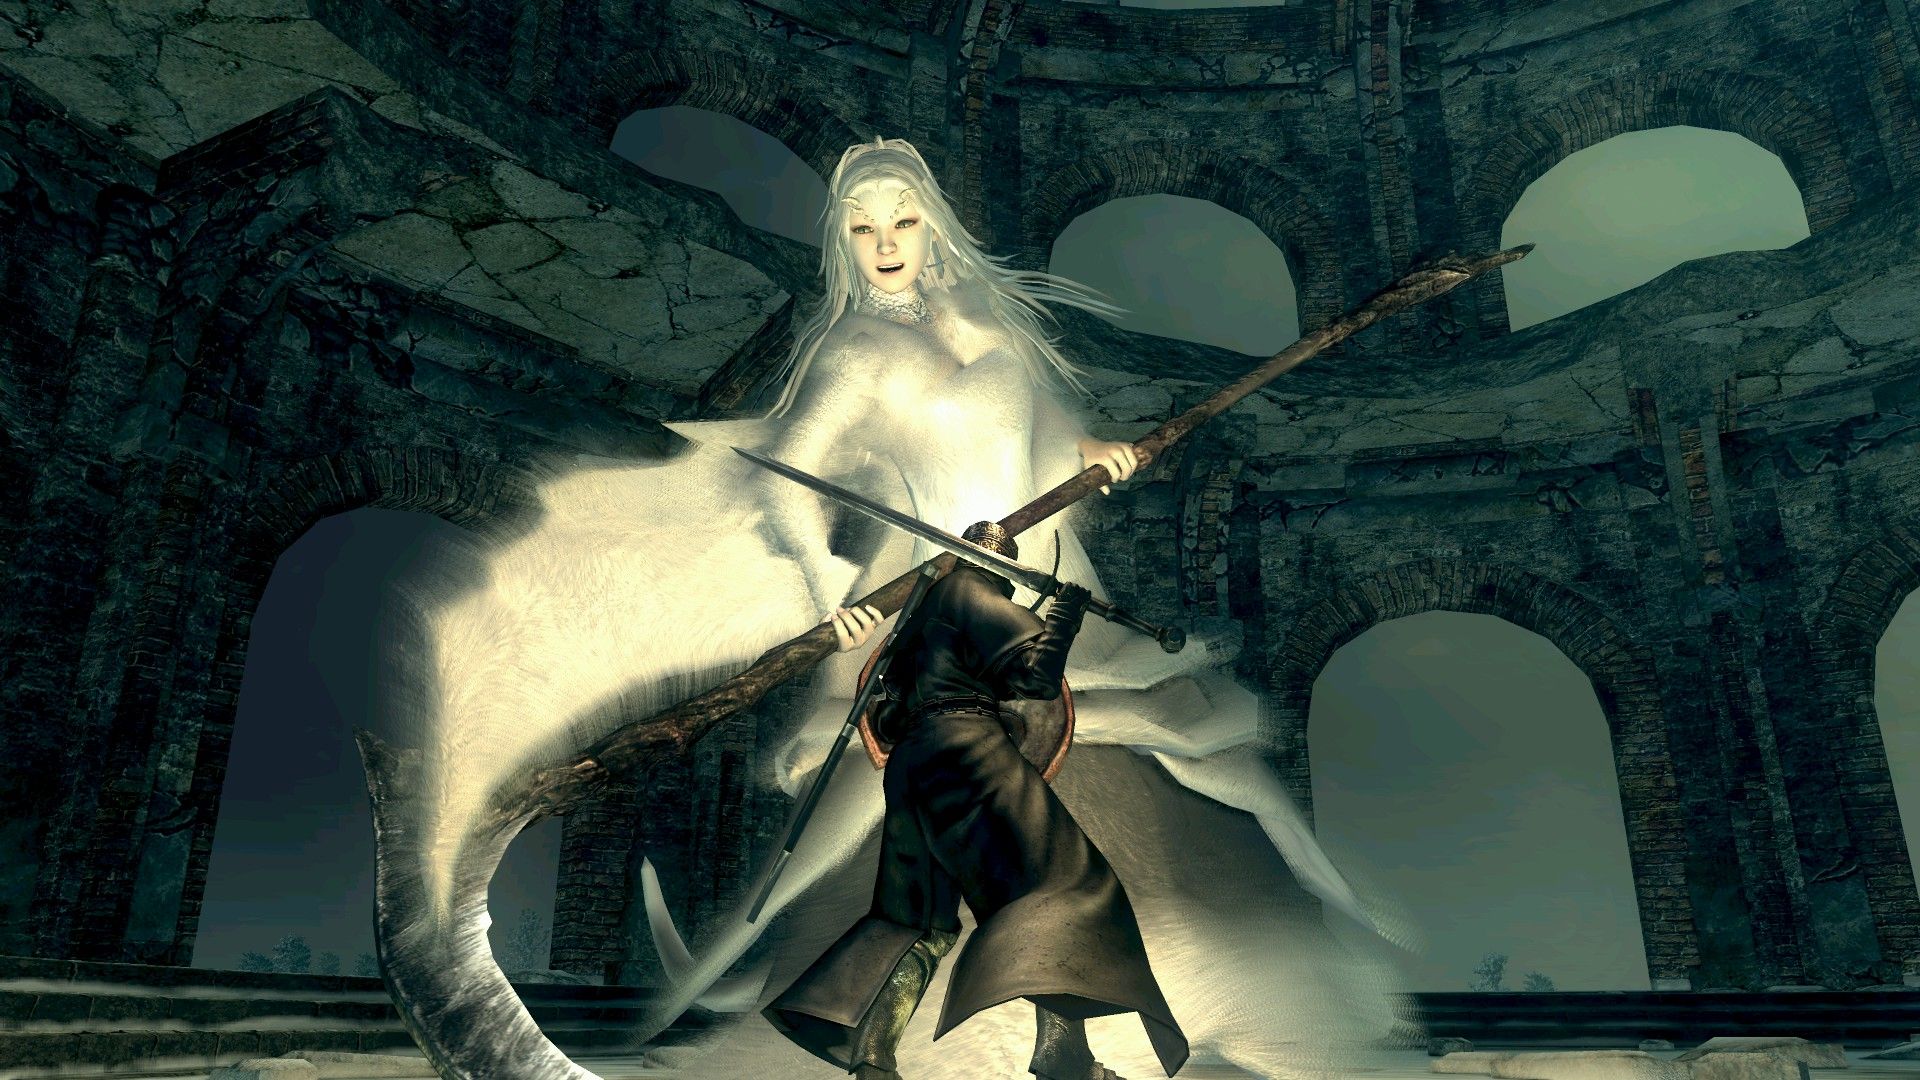
21. Crossbreed Priscilla
The most unique boss fight in the game.
Crossbreed Priscilla is the boss of the Painted World of Ariamis. What’s interesting about Priscilla is that she won’t initially attack the player when they first enter the arena. Instead, she’ll ask the player to leave via the ledge behind her. If the player attacks her, she’ll turn hostile and the battle begins.
She’ll begin the fight by turning invisible and then try to attack the player with her scythe. Her invisibility may stump players at first, but if you pay attention to the snow on the ground, you can see her footprints. You’ll have to retrace her steps and attack where you think her body is. If you do enough damage, she’ll reappear and you can fight her normally.
While Priscilla is visible, she’ll also try to hit you with an icy breath attack. Her icy breath isn’t too dangerous, but watch out for her scythe, as it can inflict the bleed status effect.
Priscilla doesn’t have a lot of health so once she’s visible, you should be able to rush her down for a relatively easy win.
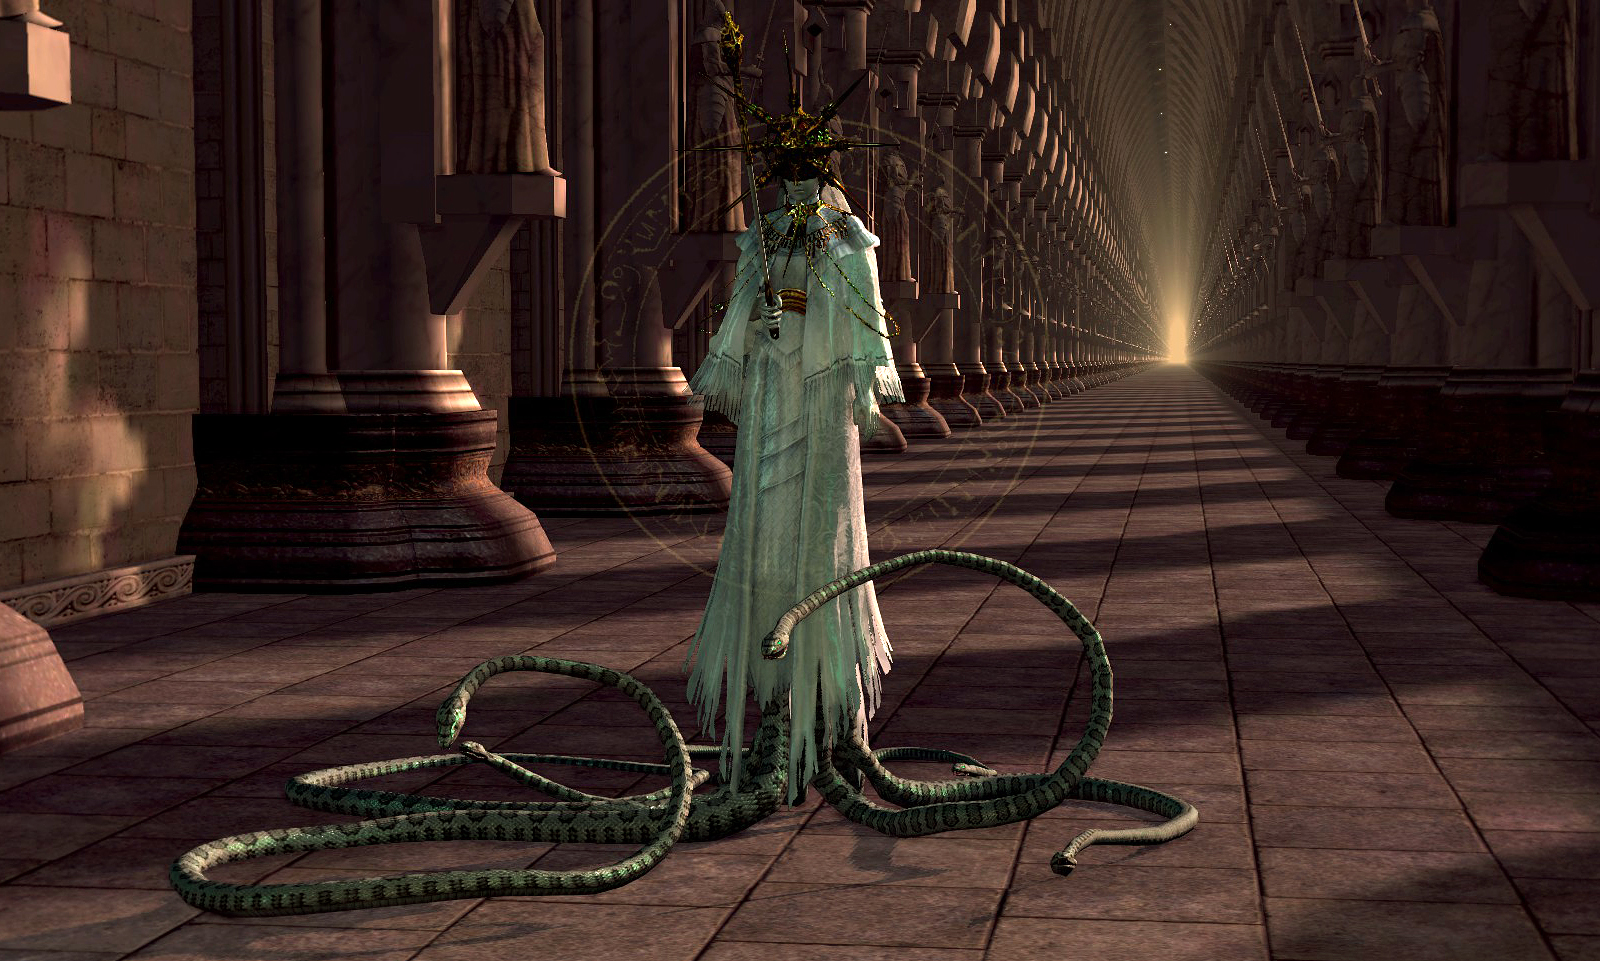
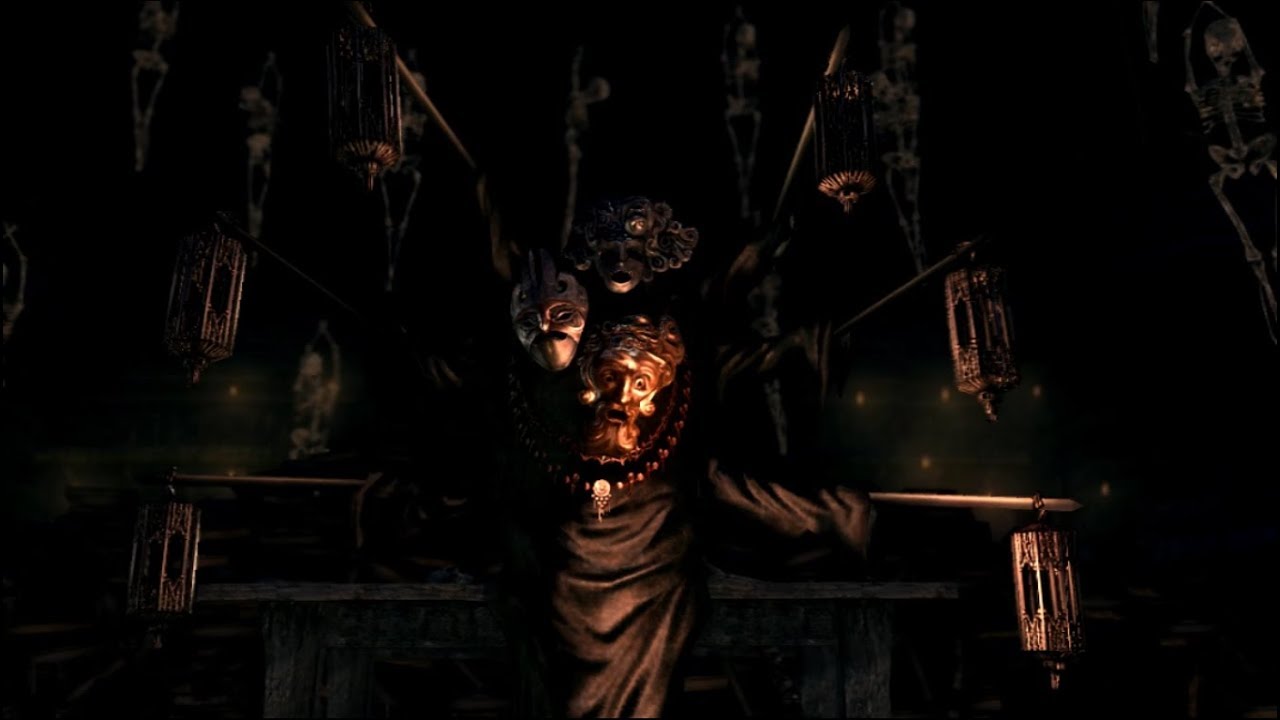
20. Dark Sun Gwyndolin
I hope you like running.
Gwyndolin is the secret boss of Anor Londo and the last born of Lord Gwyn. It’s a unique boss fight that has the player chase Gwyndolin down an endless hallway.
As players pursue Gwyndolin, the boss’ll shoot three different attacks at you. The first is a large, fast orb of magic. The second is a group of smaller, slow homing orbs. The third, a barrage of arrows. The homing orbs and arrows can be avoided by hiding behind the pillars on the sides of the hallway. But don’t get too comfortable, as the large orb attack can pass through cover.
Each attack deals a ton of damage, so one mistake can spell your doom. But once you learn how to dodge each of these attacks, the fight becomes relatively easy.

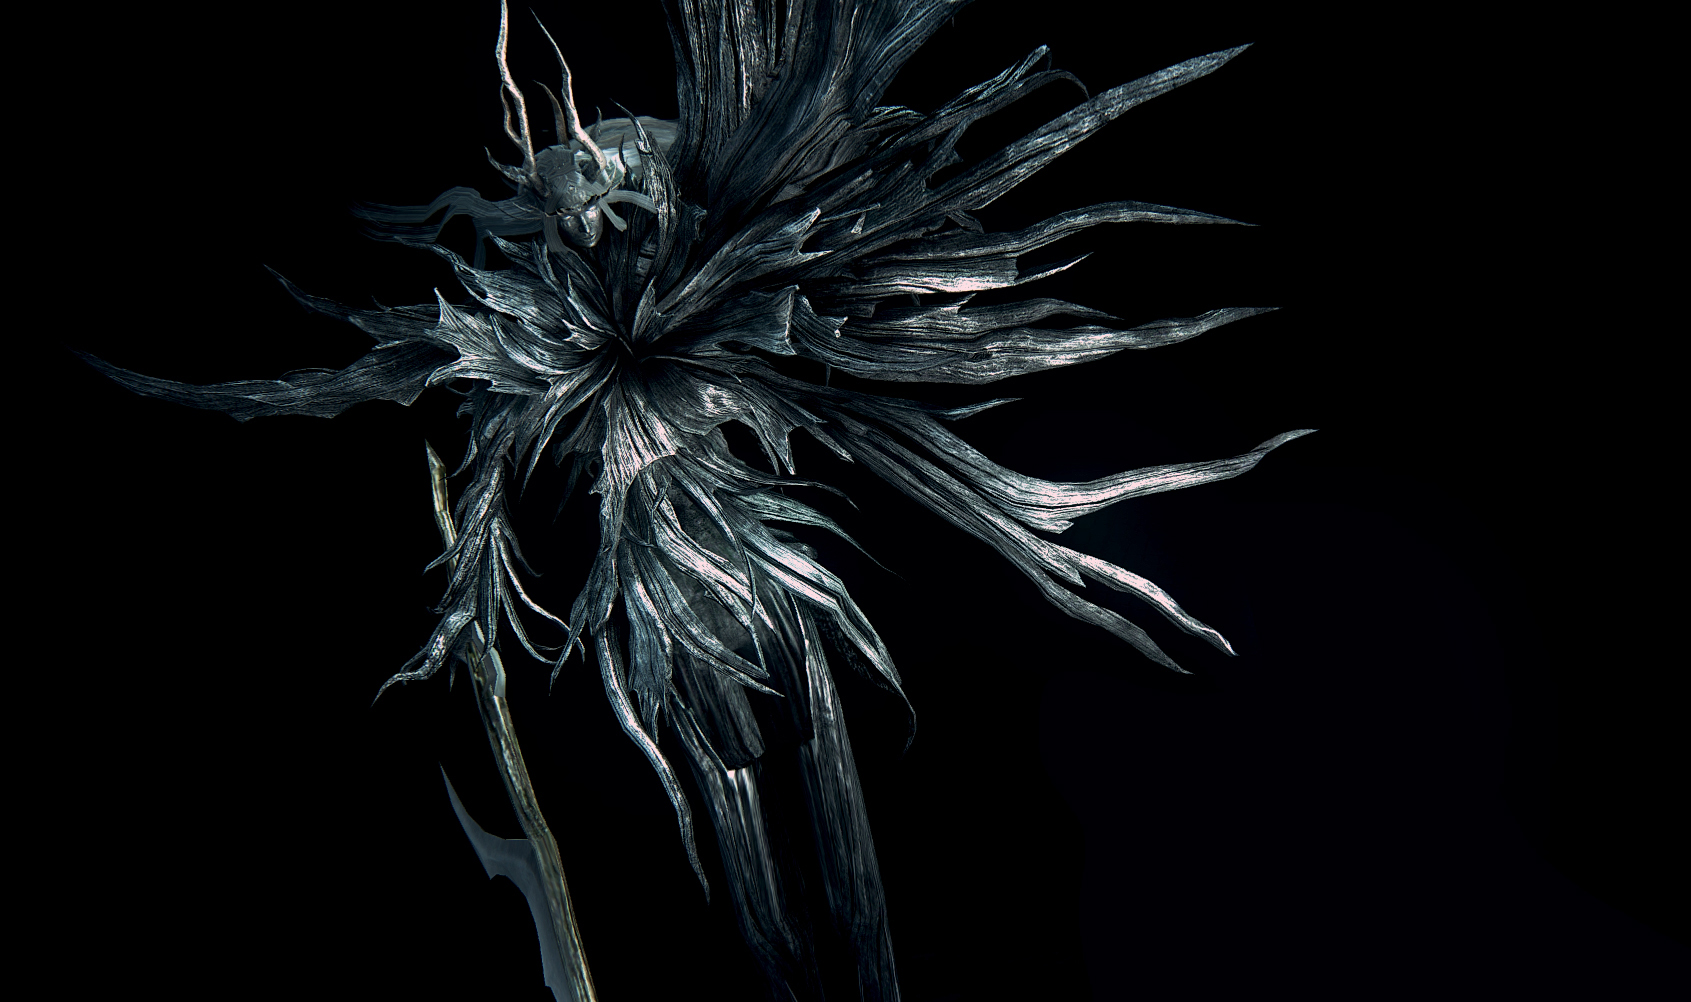
19. Moonlight Butterfly
Just come down here already!
Moonlight Butterfly is one of the bosses of the Dark Root Garden. You’ll encounter this colossal butterfly on a stone bridge as it flies just out of reach, shooting magic at you.
This is another fight that tests the player’s patience as without any form of ranged combat, you’ll have to wait for the butterfly to come to you. Before it comes down for punishment, the player will have to dodge an onslaught of magic-based attacks. There are two main attacks the butterfly will cast. One is a series of slow-moving orbs that deal massive damage if they hit you, and the other is a fast spear attack.
Learning how to dodge these two attacks is the key to success. After a while, the butterfly will perch itself on the side of the bridge, opening itself up to melee attacks. You’ll have to get it to perch two to three times before it dies, depending on how much damage you do. Once the boss is below 50% health, it’ll mix two other attacks into its arsenal: a beam attack, and a bomb attack. That said, I find it tends to use its first two attacks the most, so knowing how to dodge those is the most important.
The challenge of this fight is that Moonlight Butterfly deals solely magic damage. It’s likely the shield the player has equipped for the fight won’t block magic damage well. So, unfortunately, even if you block an attack, you’ll still take a ton of damage.
It is possible to obtain the Crest Shield, which has very high magic defense, before facing Moonlight Butterfly. This’ll trivialize the encounter.
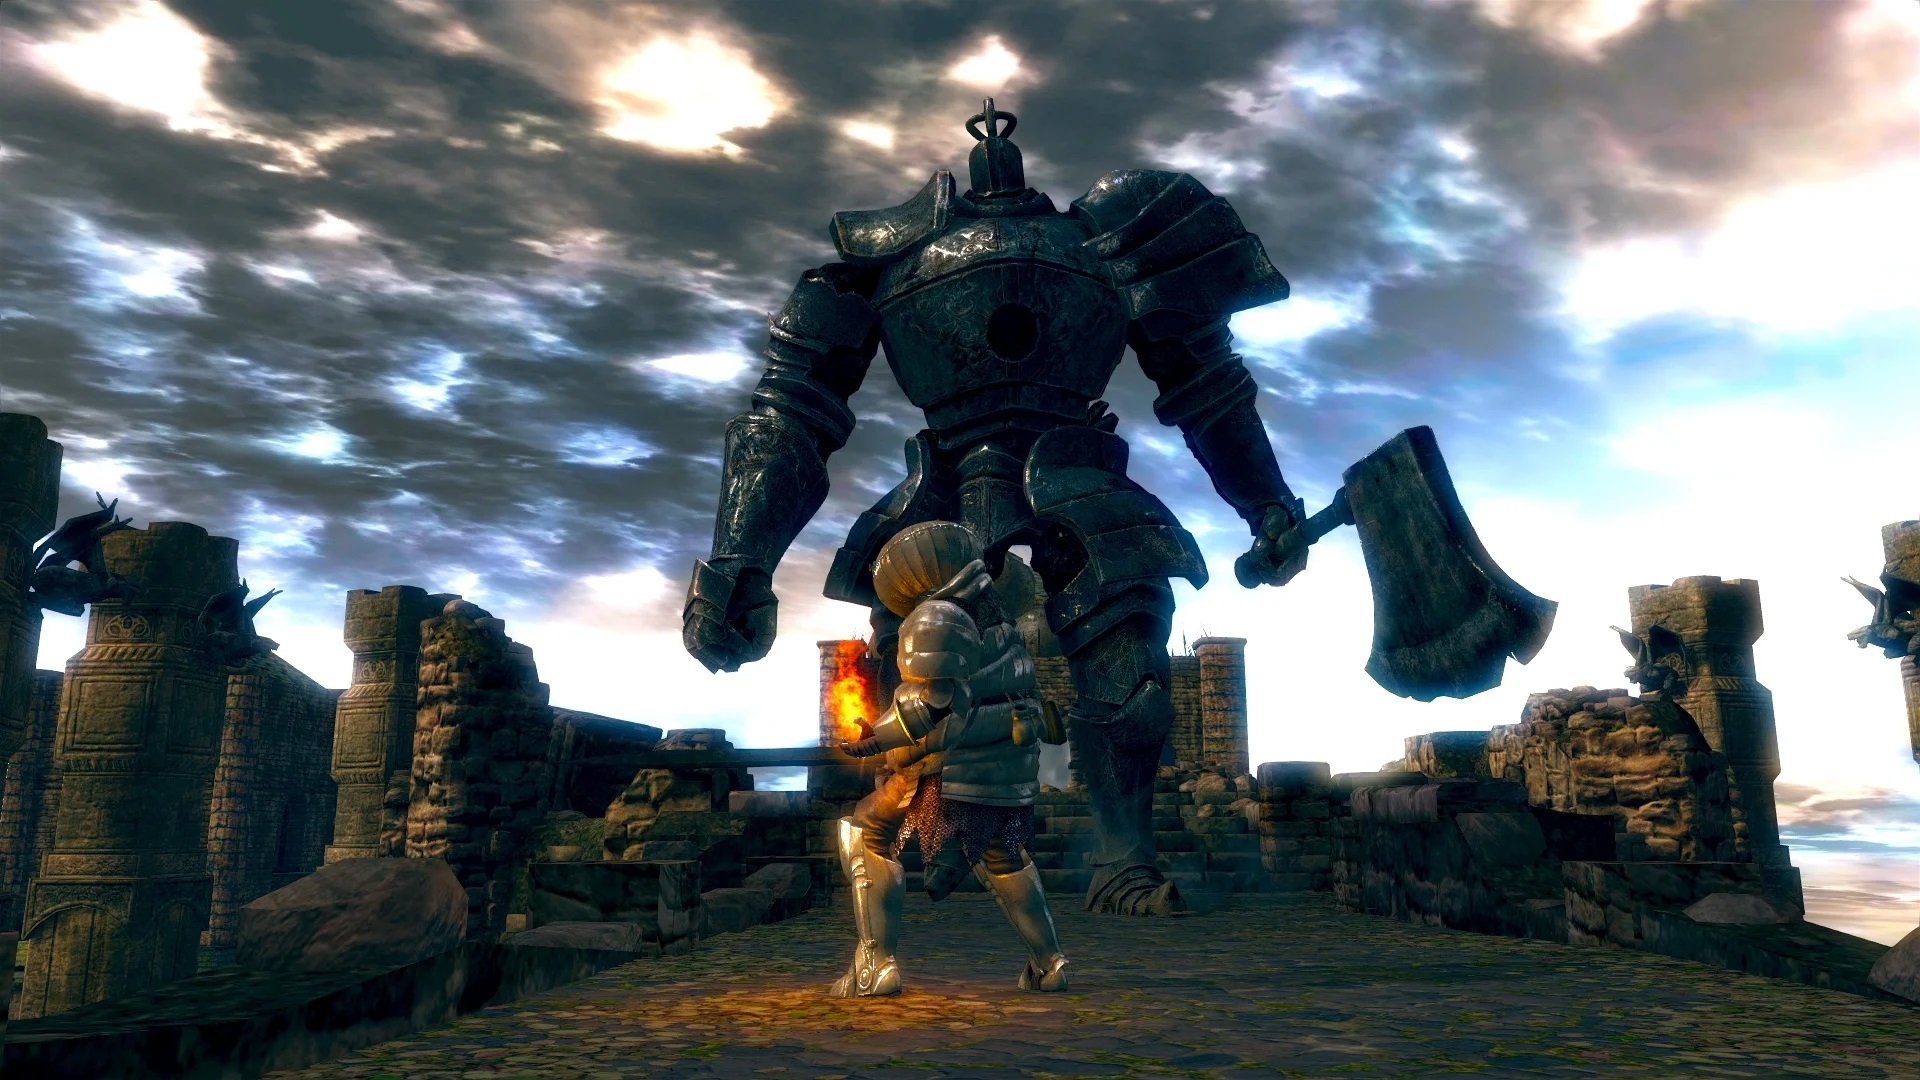
18. Iron Golem
It’s so satisfying to topple this guy over.
The boss of the infamous Sen’s Fortress, the Iron Golem is huge compared to the arena you fight it on. This can be annoying, as it’s easy to accidentally fall off the edge during this fight, and the Golem can easily throw you off if it grabs you. However, you can also knock the giant off the edge as well, making this fight a cinch.
When the fight begins, run to it as fast as you can while it’s still on the narrow section of the arena. Get under it and start wailing on its legs as aggressively as possible while avoiding its axe swings. If you deal enough damage to its legs, the Golem will start to wobble. When you see this happen, keep attacking until the Golem falls over. If it falls backwards off the edge, it’ll instantly die. However, this is a high-risk, high-reward strategy. It’s just as easy for you to be thrown off the edge as it is for the Golem.
A less risky strategy involves luring the boss to the open area. Avoid going under its legs, as the Golem can grab you. Instead, space around it and dodge its axe swings. These attacks are slow and predictable, making them easy to avoid. Keep attacking at the Golem’s ankles and it’ll fall over. Even if it doesn’t fall off the edge, you’ll be able to get in a ton of damage in the process.
If you can avoid the grab attack and keep attacking its legs, then Iron Golem will fall—literally.

17. Seath the Scaleless
Not gonna be immortal for much longer.
Seath is the master of the Duke’s archives. You first encounter Seath in his archives and are actually unable to beat him. You’ll find him impossible to hit; even if you have ranged attacks, nothing will damage him.
This is intentional. When you die here you’ll be transported to a cell where you can gain access to the rest of the area. You’ll progress all the way to the Crystal Cave and find the Primordial Crystal, the source of Seath’s invincibility. Seath will fly down to stop you from breaking the crystal, and the revenge match begins.
At the start of the fight you simply have to destroy the Primordial Crystal and Seath will become stunned, opening him up to damage. At this point Seath isn’t much of a challenge. The trick is to not get behind him, because that will cause him to flail his tails which is a deadly attack.
Instead you’ll actually want to stay near Seath’s front. While you’re in front of him, he’ll use his breath attack and a crystal explosion attack. I actually find it easier to fight this boss without lock on, as that way I can keep an eye on his head. Watching his head will cue you into his attack, as well as the direction it’ll come from. Most of the time, staying near him will actually cause his breath to miss.
However, don’t get too comfortable. If you see him curl up, that means he’s about to unleash an explosion of crystals and you’ll have to be as far away from him as possible for it to miss. This is easily his most lethal attack. The annoying thing about this fight is that his crystal-based attacks will inflict the curse status effect, which is an instant death for the player. What’s more, you’ll respawn with permanently decreased health, so be sure to bring a couple of Purging Stones.
*Fun fact: Cutting off Seath’s Tail will give you the Moonlight Greatsword, an iconic sword from the Souls series.

16. Demon Firesage
Hmmm, doesn’t he look familiar?
A reskin of the Asylum Demon, this guy is almost identical to his brother. And that means he’s not very tough. The objective will be to close in Firesage as soon as you can, as he starts pretty far away from you and can pin you down with explosions if you don’t get to him quickly.
When you do close the gap, try to bait out his ground-pound attack. I find he does this attack often when you attack his belly. He’ll sometimes do it multiple times in a row for consistent damage. Also look out for Firesage’s explosion attack. When you see it, just back away and hold up your shield to “tank” the hit. You should have plenty of time to heal afterwards.
You don’t want to go right behind the boss during this attack. His explosions can extend to its backside, making them hard to dodge.
Be brave. Fight him up close while watching out for his explosions, and the Firesage should turn to ash in no time.
15. Stray Demon
Seriously… Again?
This guy is actually the first demon you can see in Dark Souls. Look to your right when exiting your cell at the beginning of the game, and you’ll see him walking around. He’s a reskin of the Asylum Demon, but like the Demon Firesage, can cause giant explosions. His explosions deal a ton of damage, but if you can get behind the boss you’ll be safe.
Once you’re behind this guy, he’ll use his explosion attack repeatedly. From there, it’s as simple as backing up to dodge the explosion, then moving in for a couple of attacks. Sometimes he’ll mix in a ground pound or axe swing, but both are well-telegraphed and easy to avoid.
The most difficult part of this fight is the beginning, as you’ll take a fair amount of fall damage when entering the arena. One way to make this fight easier is to use a weapon with the ability to apply bleed, like the Uchigatana. He’s very susceptible to this status effect and will become much easier to defeat once inflicted with it.
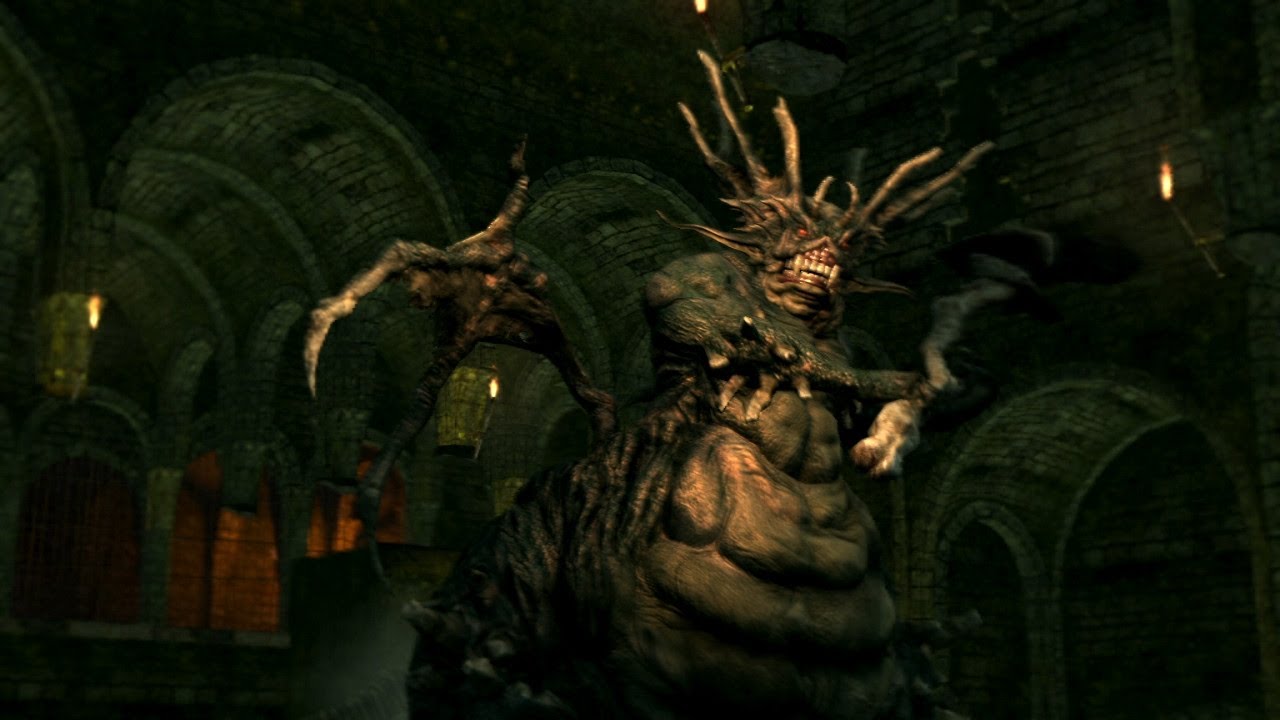
14. Centipede Demon
Ugh, I hate bugs.
In this fight you’ll be put in an arena that’s mostly covered in lava. You can choose to fight the Centipede Demon on the small portion of land at the entrance to the arena. Or, you can travel to the right to find some more wide open spaces. However, to get to these spaces, you’ll have to run through the lava and take a lot of damage.
If you’re able to chop off the Centipede Demon’s arm, you’ll get the Orange Charred Ring. When worn, the ring almost completely negates damage from lava. This can be tough, though, as hitting the Demon’s arm isn’t easy. A trick I like to use is to wear the Flame Stoneplate Ring, which raises your fire defense. This will slightly lower the damage from the lava, allowing you to more easily make it to one of the open spaces in the arena.
You want to lure the Demon in close. If you let it stray too far away, it’ll use a ranged attack that’s very annoying to deal with and can break your guard easily. Once it’s close to you, the boss will spend most of its time jumping in the air, trying to flatten you. When it’s not doing that, it’ll try to stomp on you. In either case, just back away and punish the Demon following its attack.
As long as you’re able to survive the lava and lure it close to you, the Centipede Demon will be squashed like the bug it is.
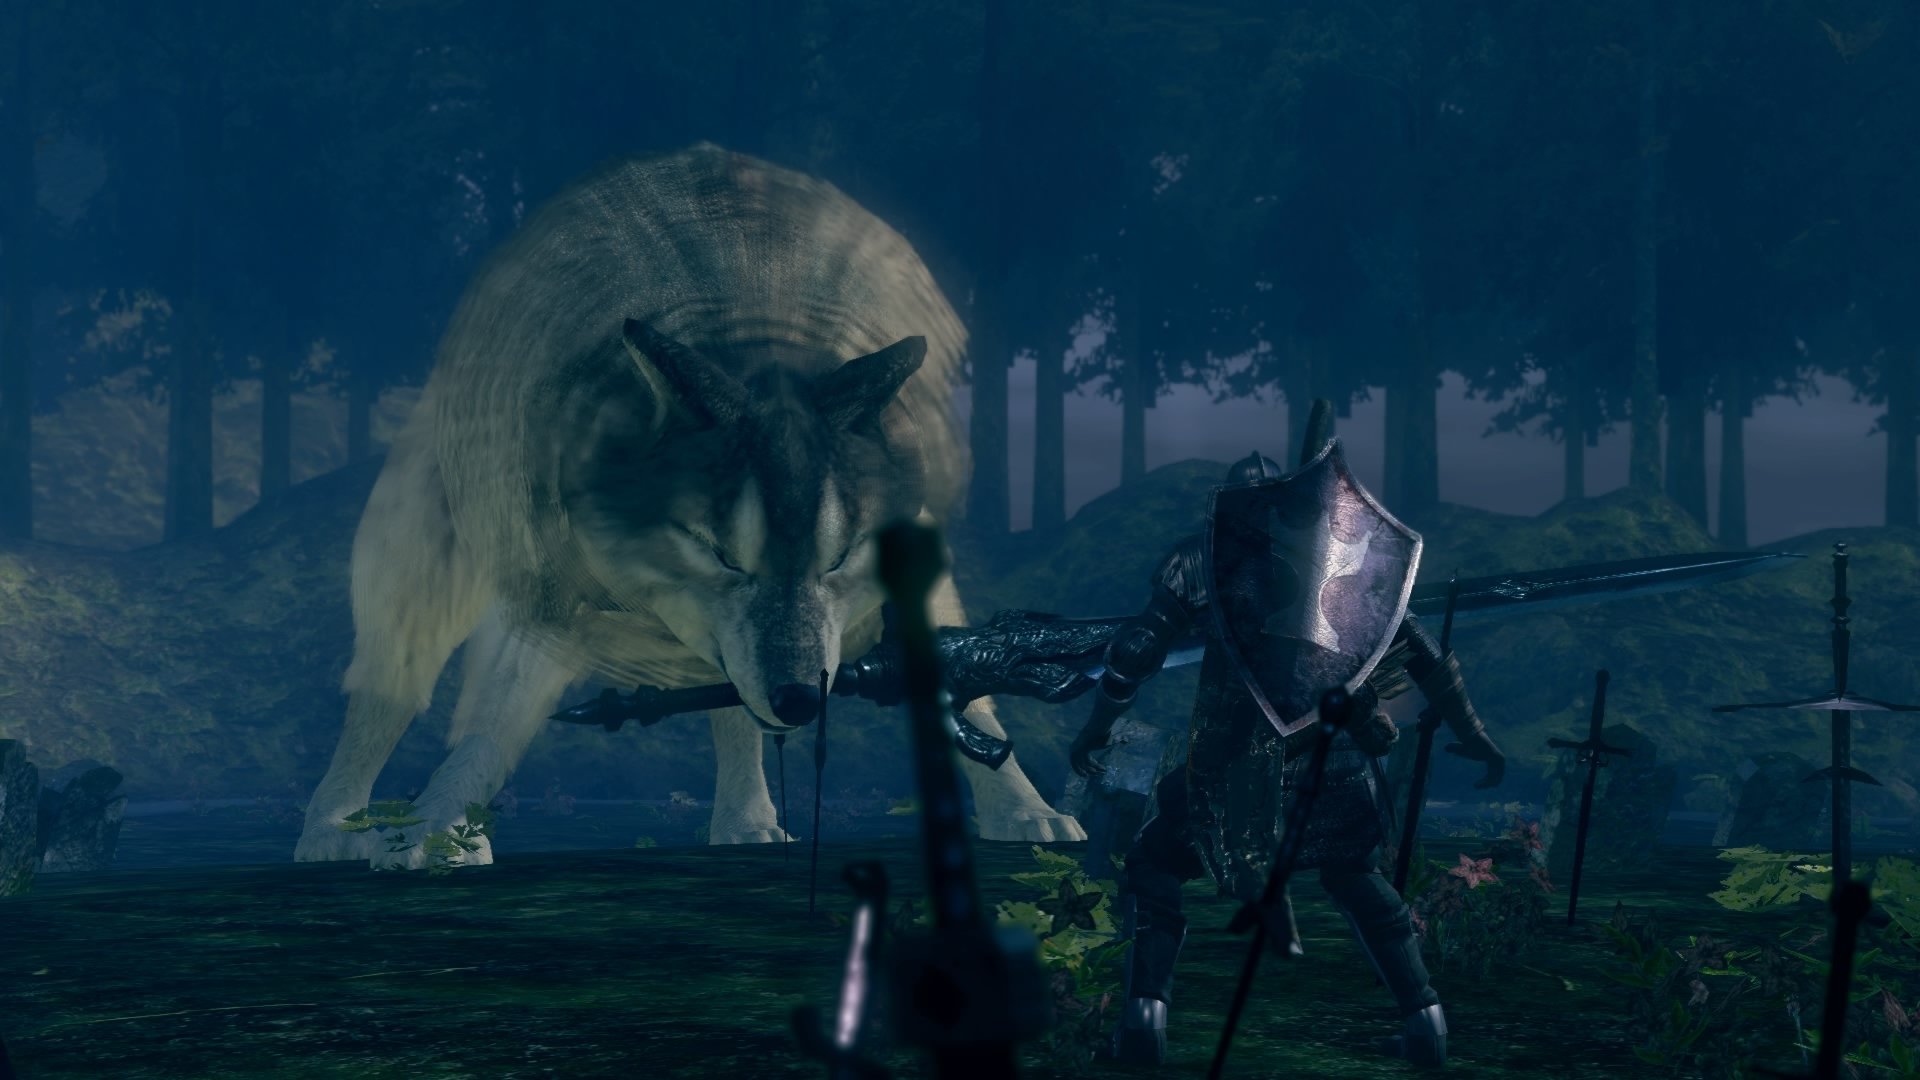
13. Great Grey Wolf Sif
Do I have to kill him?
Sif is the companion of the legendary Knight Artorias. If you completed the DLC before finding him in the Darkroot Garden, then you might have met him before.
The fight against this giant wolf isn’t too hard. He’ll swipe at you with the sword in his mouth; these attacks can be easily blocked if you have a decent shield and stamina. Your objective is to get under him, as he has trouble hitting you from there, letting you get easy damage. Just watch out for his spin attack. The second hit of his spin will often break your guard, doing decent damage.
Sif also likes to jump around a lot, making it hard to get under him. But be patient, and eventually you’ll be able to get your hits in. The sad part of this fight is once he’s low on health he’ll start limping and barely be able to lift his sword anymore. It’s very sad, but you’ll put him out of his misery.
*Fun Fact: If you save Sif in the DLC before encountering him in the main game, it’ll actually change the opening cutscene to his boss fight.
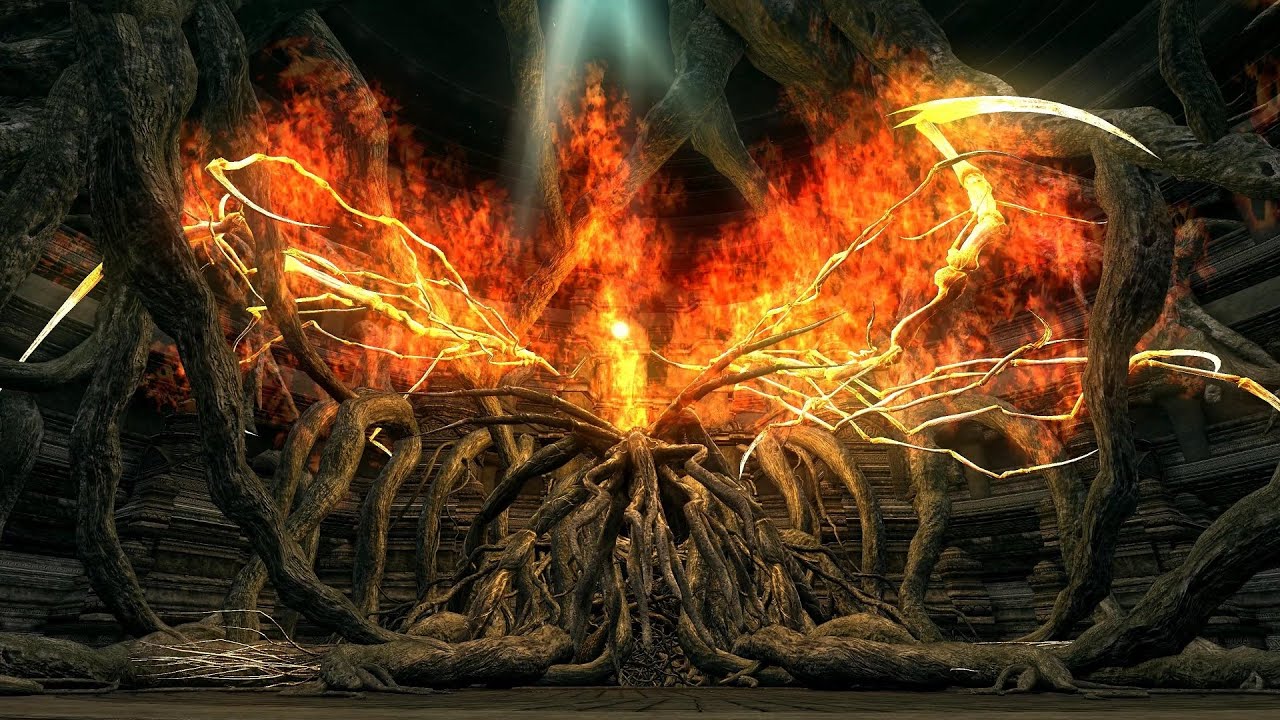
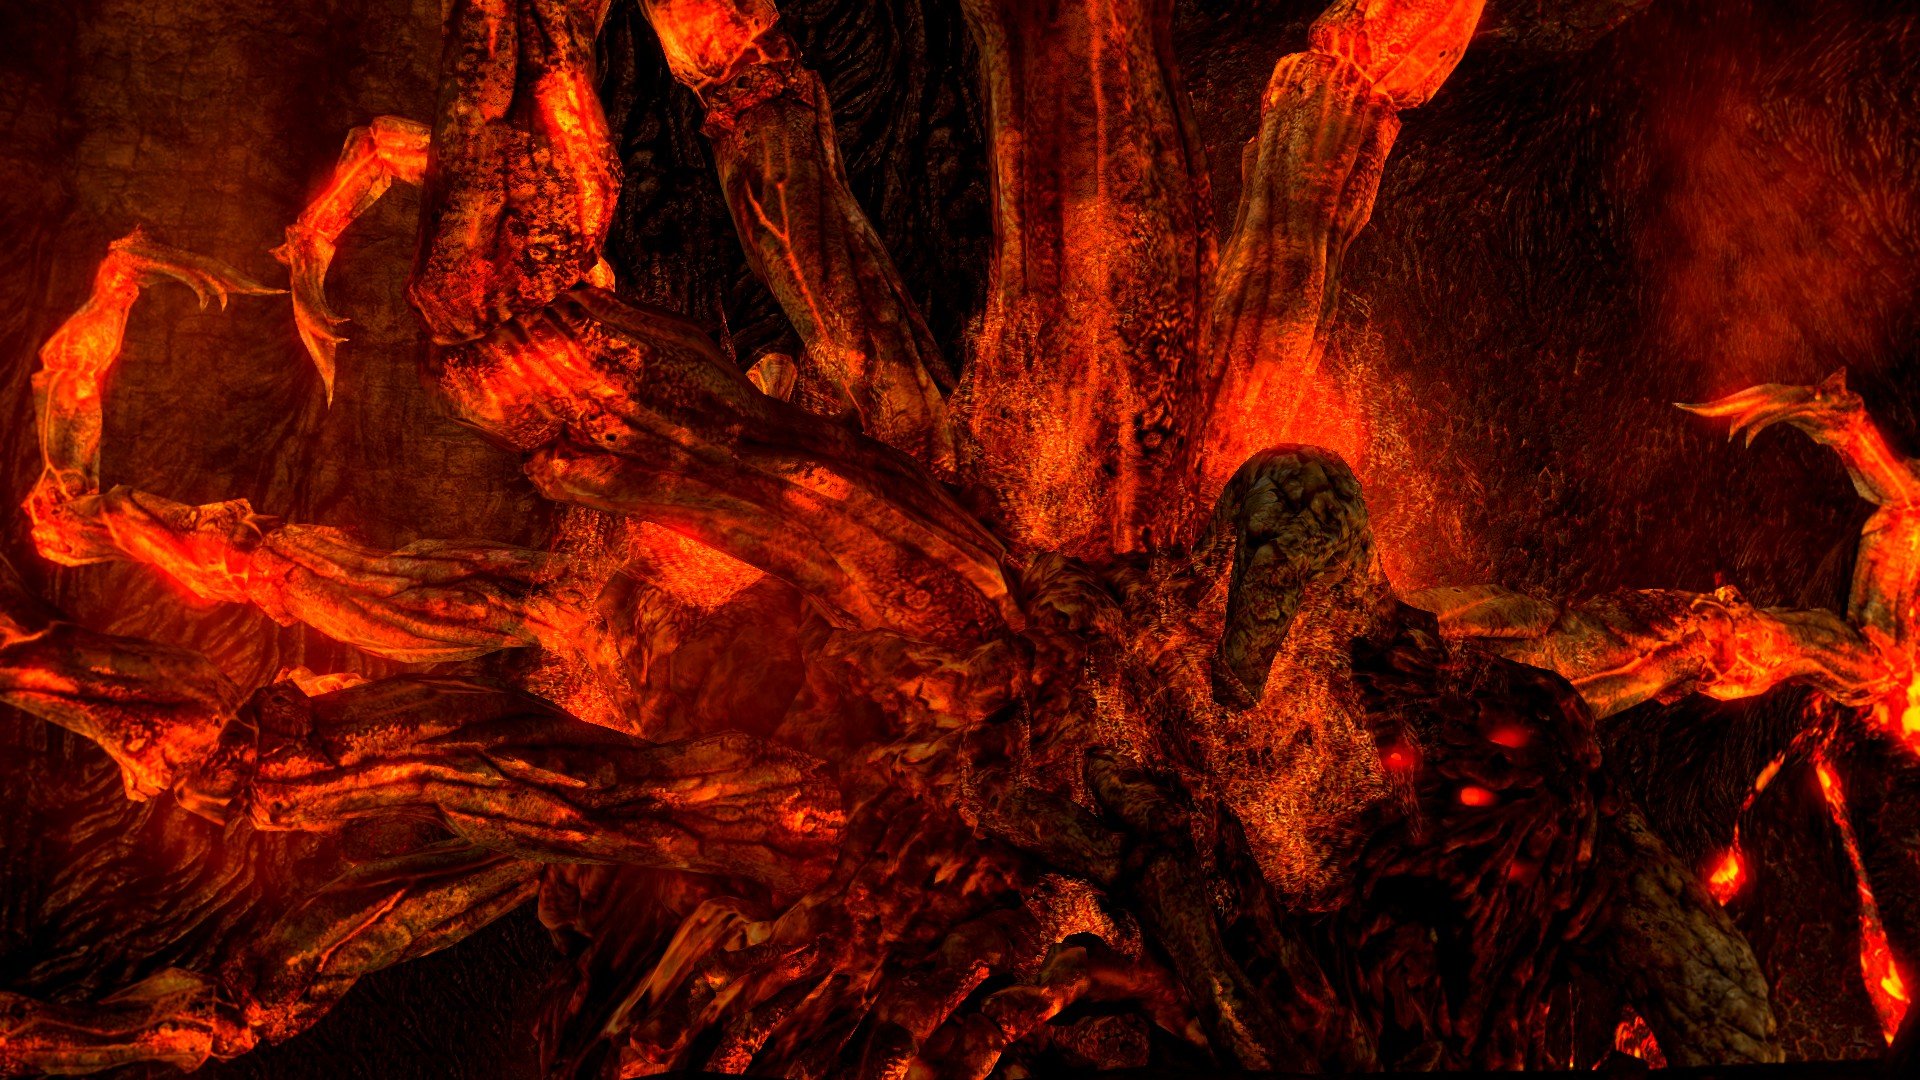
12. The Bed of Chaos
A chore of a fight, and easily the most annoying in all of Dark Souls.
There’s almost no way not to die to the Bed of Chaos. It’s more a puzzle than a boss: When you drop into the arena, make your way to the side where you’ll find some glowing roots. Cut one root and the boss will grow a demonic arm. Then, the floor will start falling out from under you.
This is where it’s almost impossible to stay alive. It’s hard to predict where the floor will give out unless you’ve fought the Bed of Chaos before, and it’s even harder to avoid getting knocked into a hole by its attacks. Thankfully, your progress during the fight saves as you go. If you break one of the boss’s roots and die, that root remains destroyed.
After enough trial and error, you’ll eventually break two roots and notice that the floor directly beneath it will collapse when approached. If you look closely, there’s a root you can jump to. If you land on the root, you can make you way to the boss’s main body and find a growth-like core. Hit that core once, and the Bed of Chaos instantly dies. Just don’t take too long, as in its final phase it can create pillars of lava beneath you, even when you’re at its core.
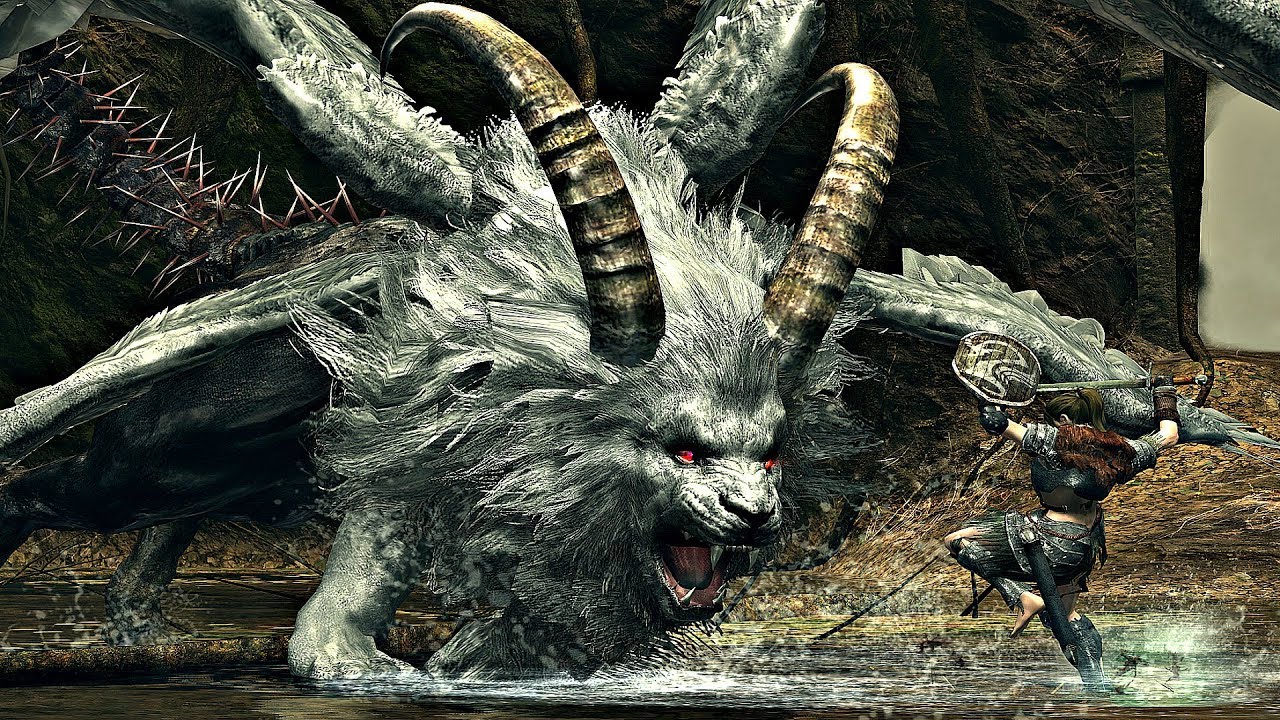
11. Sanctuary Guardian
It’s a lion… I think?
You’ll be pitted against the Sanctuary Guardian immediately upon entering the DLC. Bring a shield with good lighting defense, as the boss likes to spit lighting at you a lot. The Guardian will fly around as it does so, making it hard to hit. Try to stay aggressive so you can get in close for some decent hits.
Occasionally, the Guardian will stay grounded and attack you with a flurry of claw and horn attacks. This is one of your biggest openings. Keep your shield up and strafe to its side for a good opening to get lots of damage in. Don’t go all the way behind the Guardian, though. That’ll cause it to attack with its tail, which has a scorpion stinger on it that’ll inflict poison. Make sure to bring some Purple Moss with you just in case this happens.
Be patient while Sanctuary Guardian’s flying around. Try to get in close to bait his ground attacks and you’ll come out on top as you officially start your adventure in Oolacile.
The top 10 bosses are in a league of their own. They all embody what’s truly hard about Dark Souls.

10. Gravelord Nito
The first of the dead and master of miasma and death.
Gravelord Nito can be found at the end of the Tomb of the Giant. This boss can be tough if you’re not prepared. Because of this, he can be brutal for a first-time player. There are six enemies in the arena with Nito: three small skeletons and three giant ones. The skeletons will self-revive if you aren’t using a divine weapon.
These enemies are what make this boss hard. The trick is to stay on the side of the arena that you start on. Only go for the small skeletons, even without a divine weapon; once Nito gets close to you, his attacks will keep them down. (Of course, if you have a divine weapon you can kill them and they won’t respawn.)
Once the skeletons are dead, Nito himself is easy. All of his attacks are slow and well-telegraphed. The one attack to look out for is his large area-of-effect (AoE) move.
Overall, Nito’s an intimidating boss, but fairly easy if you know how to prepare for him.
9. Capra Demon
More of a fight against the arena.
The Capra Demon can be found in Lower Undead Burg and has the smallest arena in the whole game. That, plus the fact that Capra has two dogs backing it up, makes this fight brutal. However, if you can kill the Demon’s dogs, then it becomes trivial.
The first couple seconds are the hardest. The moment you enter the room, the Capra Demon and its dogs will rush you and try to lock you in a corner. The boss will almost always open with a jumping attack. Immediately dodge to the right to avoid this attack, then run to the staircase behind it. Lure the dogs to the top of the staircase and take them out. Having high poise can help here, as it’ll ensure the dogs can’t interrupt your attacks.
After that, you’ve pretty much won. The Demon itself has easy attacks to dodge or just block with your shield, and it doesn’t have a lot of health. Even though the majority of this fight isn’t too hard, the opening seconds of having to deal with the dogs and the tiny arena is tough and is very easy to mess up. If you do, you’re most likely dead.

8. Chaos Witch Quelaag
There’s always gotta be a spider boss.
The boss of the dreaded Blighttown, Quelaag’s a Witch of Chaos whose upper body has been attached to a demonic spider. Quelaag is pretty aggressive and likes to fill her arena up with lava, limiting the player’s room to move. Quelaag will immediately rush at you and either swipe at you with her sword or have her lower half spit up a bunch of lava. Watch out for her sword, as it deals fire damage that will affect you even if you block.
If you see her preparing a sword attack, you’ll actually want to get in close and strafe around her right side. That way all of her attacks will miss, and you’ll be able to get a lot of damage in. Another good opening for attacks is when her spider body is spitting up lava. While you’re up close, just watch out for her AoE attack: She’ll pat her spider body on the head before unleashing it.
The main challenge of this boss is the lava she spews on the ground. It remains there for a while and will damage you if you step on it. This forces you to pay attention to your surroundings while dealing with the boss, which can be tough. If you see that a part of the arena has too much lava on it, run to the other side and lure Quelaag over there.
If you can stay mindful of the lava and avoid her AoE attack, then Quelaag won’t be in your way for long.

7. The Bell Gargoyles
Wait, there’s two?!
This boss is the first real roadblock of the game. It’s almost as if Dark Souls is telling you, “Did you think the game was getting too easy?”
You start out the fight against one Gargoyle. Already, he’s faster and more aggressive than the bosses you’d have already fought, like the Taurus Demon. What sucks for you is that once the first Gargoyle is at half health, a second one will jump down to join the fray. Also, now they both breathe fire at you!
If you can’t take down the first Gargoyle quickly, then you are gonna have a rough time. Trying to deal with one’s halberd attack while the other’s breathing fire is nearly a death sentence. The best thing you can do is be prepared to rush down the first gargoyle while the second one is still jumping down, so two-hand your weapon and get ready to dish out some serious damage.
Another tip is to make sure you lower the first one’s health to half while fighting it near the entrance of the arena. When the second one jumps down, it will be on the other side of the arena. It’ll have to run over before it can start attacking, giving you a few more precious seconds to finish off the first guy.
If you’re unable to finish off the first Gargoyle, all is not lost; it’ll just be very difficult. Keep your eye on the one who likes to breathe fire and wait for it to do so. It’ll be stuck in a fire-breathing animation for a little bit. So if you’re able to avoid the fire, use this time to get a couple more hits in on the first guy, who’s likely smacking you in the face.
Keep at it, and both Bell Gargoyles will eventually be defeated—clearing you to ring the first Bell of Awakening.
6. The Four Kings
There are definitely more than four.
The boss of the New Londo Ruins, the Four Kings fight is a race against time. Though the name suggests you’re fighting four kings, these ghastly wraiths will continuously spawn until their shared health bar is depleted.
The fight starts against one king, but if you don’t kill the first fast enough, another will spawn to back it up. That’s the challenge of this fight. You have to stay aggressive so you don’t get overwhelmed as more kings join the battle. If you’re fast enough, you should be able to fight each one on one.
The kings themselves are easy enough. While far away, they’ll shoot a slow-moving mass of magic at you—just block it. As long as your shield has high magic defense, you won’t take too much damage. While up close, the kings will mainly swipe at you with their sword. Strafe around with your shield up, and most of the attacks will miss, leaving the wraith open. At the same time, watch out for the kings’ grab attack or magical explosion, as both inflict massive damage.
It may take a couple tries to master dodging all their attacks while staying aggressive. But after killing four to five kings, you should emerge triumphant.
*Fun Fact: While one of the kings is in its dying animation, you can still attack it to inflict damage to the overall health bar.

5. Gwyn, Lord of Cinder
Finally.
Gwyn’s the final boss of the main Dark Souls campaign. He’s extremely aggressive, more so than anything you’ll fight in the game. And his sword’s on fire, so be sure to equip a shield with decent fire resistance.
Due to the speed of Gwyn’s attacks, it will be hard to dodge all of his attacks. That makes your shield your best friend here. Strafe around him with your shield up and block his sword combos. Just be sure to lower your shield in between sword strikes to gain a bit of stamina back. He’ll sometimes try to kick your shield, which will most likely break your guard. So be sure either dodge or back away when you see him raising his foot.
Another attack to watch out for is Gwen’s grab. It’s easy to spot, but if it hits you’re gonna take more than just a scratch. Keep your cool, block his attacks, and hit him once when you have an opening.
Rinse and repeat, and the ending credits will be rolling momentarily.
*Tip: Almost all of Gwyn’s attacks can be parried. So if you’re confident in your parrying skill, he might just be the easiest boss in the game. Fortunately for Gwyn, a lot of players aren’t.
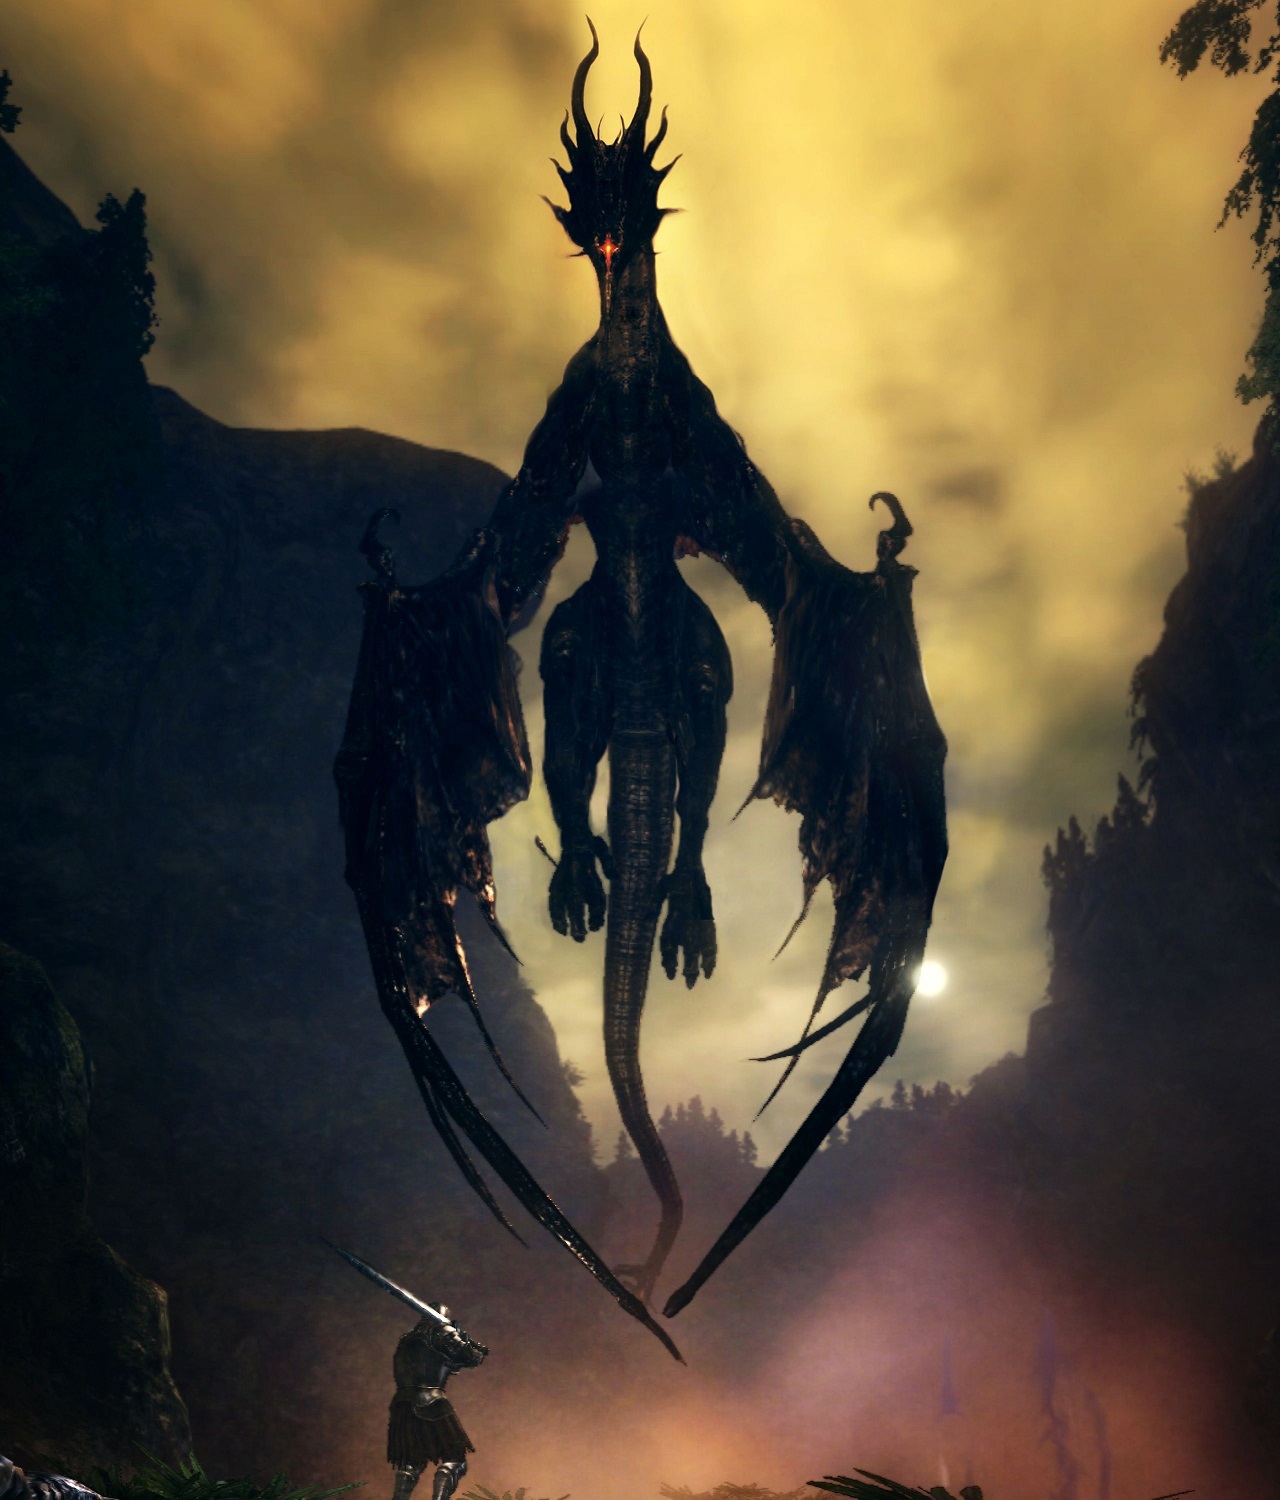
4. Black Dragon Kalameet
I’ve been waiting for this.
Kalameet is the DLC’s secret boss, who you’ll actually see a number of times throughout the Royal Woods. The second time you find him, though, he’ll fly out of reach, spitting fire at you in annoying fashion. If you enlist the help of Hawkeye Gough, you’ll be able to bring him down to your level.
Kalameet’s extremely intimidating and has the strength to back it up. You’ll want to get in close to him as soon as you can, else you’ll fall prey to his onslaught of fire breath. If you see him breathe fire in a straight line toward you, this is a good chance to close the distance. Side step the fire and run as fast as you can up to him.
Once up close, stay locked on and strafe around him while paying close attention to his attacks. A lot of his breath attacks will miss while you’re strafing, leaving him open to retaliation, but be prepared to dodge his melee attacks. Your instinct might be to get under him, but he has a stomping attack that can hit you while you’re under his belly.
Always try to dodge in this fight! Blocking Kalameet’s melee attacks will take out nearly your entire stamina bar. And he’ll often follow up and break your guard. His fire breath attacks are a bit safer to block, but try to dodge them if you can; the fire can hit your shield multiple times, possibly causing a guard break.
When you’re up close to him, he’ll often try to get you with his Mark of Calamity attack. You’ll see it coming as he gets up on his hind legs when prepping it. If you do get hit with the Mark of Calamity, you’ll have to be extra careful because you’ll now receive double damage. With the hefty damage this boss dishes out, one hit could mean death.
Kalameet won’t let you stay at his feet for too long. Often, he’ll charge away and whip around with a sweeping fire breath attack. Or, he’ll fly up in the air and shoot fire straight at the ground. The charging attack can be hard to predict, but if you space yourself safely while up close it might miss you altogether. Likewise, when you see him fly straight in the air, don’t panic. Just back up and take the damage with your shield; you should have plenty of time to heal afterwards.
If you can stay close to Kalameet as much as you can, safely strafe around him, and slowly chip away at his health, the mighty Black Dragon will fall at your feet.

3. Ornstein and Smough
You must have heard the horror stories.
The infamous duo that has most people sending a controller through their wall, Ornstein and Smough are like no other boss players will have faced up until now. First of all, there are two of them! This isn’t like the Bell Gargoyles, where one enemy joins the fight later on. Nope, both are at full health and ready to rumble, right at the beginning.
The other thing is that Ornstein and Smough perfectly compliment each other. Ornstein is fast and aggressive, while Smough is slow but hits like a truck. Players will be distracted dealing with Ornstein while Smough catches up and deals a massive blow with his giant hammer. First time players might think to whittle both health bars down evenly, but that won’t work. When one dies, the other gets all their health back, then gets buffed by absorbing the powers of their partner.
My advice is to focus on Ornstein first. Be patient and continue walking around the perimeter of the arena while keeping both of them in your sights; you do NOT want to lose track of one. Try to keep the pillars in between you and Smough, as he sometimes has trouble getting around them. This will give you an opening to land some hits on Ornstein.
Once Ornstein goes down, Smough will absorb Ornstein’s lighting abilities, but don’t worry; he isn’t all that hard. Just look out for his hammer charge and ground pound. He’ll only really charge at you if you’re too far away, so try to stay close and strafe around him. If you are close to him for too long, he’ll jump up and do a ground pound, sending out a lightning shockwave. Just back up and let your shield take the brunt of the damage. (Having a shield with high lightning defense helps a lot.)
If you happen to kill Smough first, Ornstein will absorb his power and turn into a giant! He’s tough; he maintains his speed, but hits harder now that he’s huge. You’ll want to get under him, as his spear attacks have a hard time reaching you while you’re at his feet. But you’ll want to watch out for his ground pound. The other attack to watch out for is his speak attack. He’ll stick you with his spear and summon a freaking lightning bolt—with you still on it!
If you take out Ornstein first, you’ll get through this fight more easily. But if you want an extra challenge, try letting Ornstein be the last one standing.
*Fun Fact: If you do choose to kill Ornstein last, he’ll drop the Leo Ring, a great item for weapons with thrust attacks.
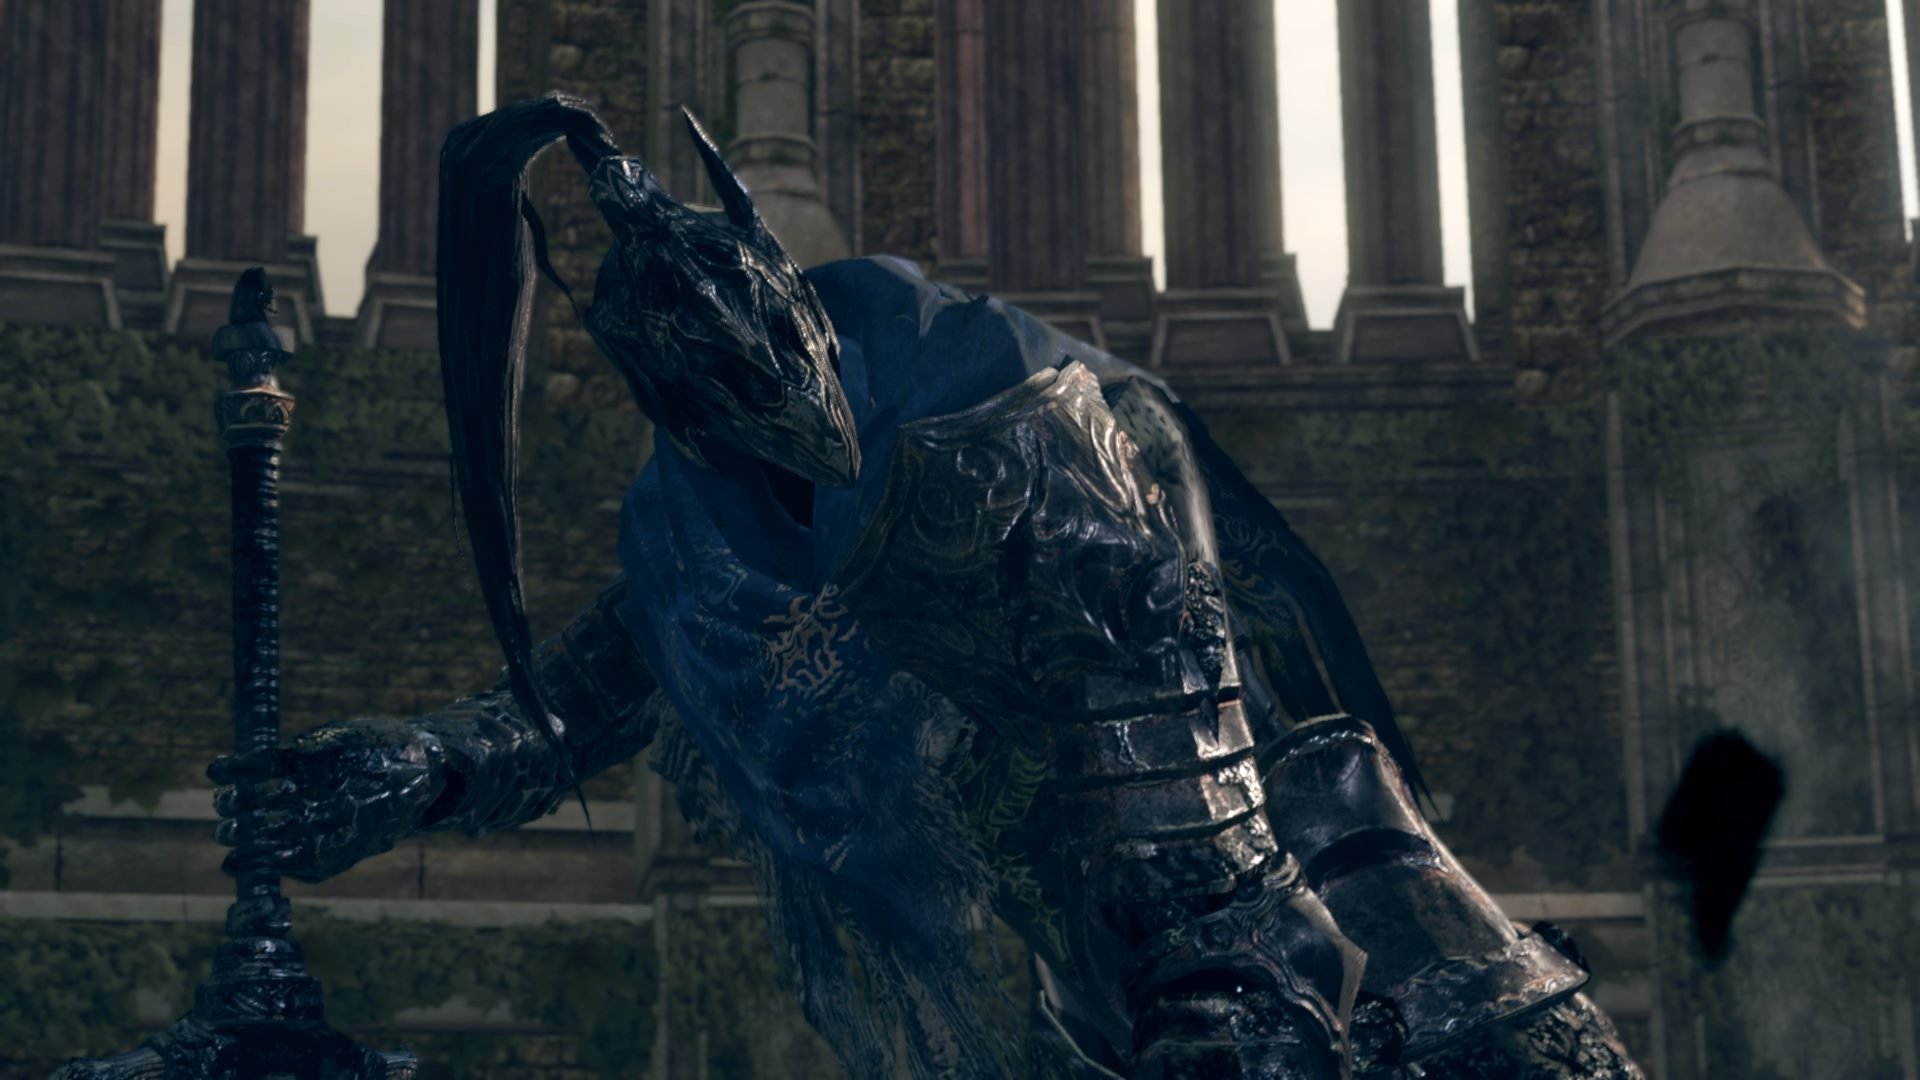
2. Knight Artorias
A duel between warriors, and my favorite fight in the game.
Artorias is one of the Four Knights of Gwyn, and one who’s famous for traversing the Abyss. Unfortunately, when you find this fallen warrior, the Abyss has already corrupted him and turned him hostile.
I love the feel of this fight. It’s a duel between warriors, but one has gone corrupt and must be put out of his misery, not because of your hate or anger toward him, but out of respect. Artorias doesn’t let you kill him easily and will put up a hard fight. He’s fast, aggressive, does a ton of damage, and has a lot of health. He has a huge array of attacks with similar tells, making his movements hard to predict, and he barely leaves any room for you to get a hit in.
If you’re using a slow weapon, be prepared to take a hit if you go in for an attack. Often during the fight, Artorias will buff himself. You’ll be able to tell because he’ll start kneeling on the ground and darkness will circle him. If you’re quick, you can actually stagger him out of the buffing process if you do enough damage. But be careful, because Artorias will release an AoE attack when he’s done buffing.
When buffed, Knight Artorias becomes more aggressive and even more dangerous. Some of his attacks can nearly one shot you, so make sure you’re at full health at all times. With this fight, you really have to choose your openings wisely. He has a couple of attacks that are very safe to punish, like his jumping attack where he howls in mid-air, and his charging stab.
If even for a second you get too aggressive and over-extend against this fallen warrior, you’ll be sent back to the Bonfire before you know it.
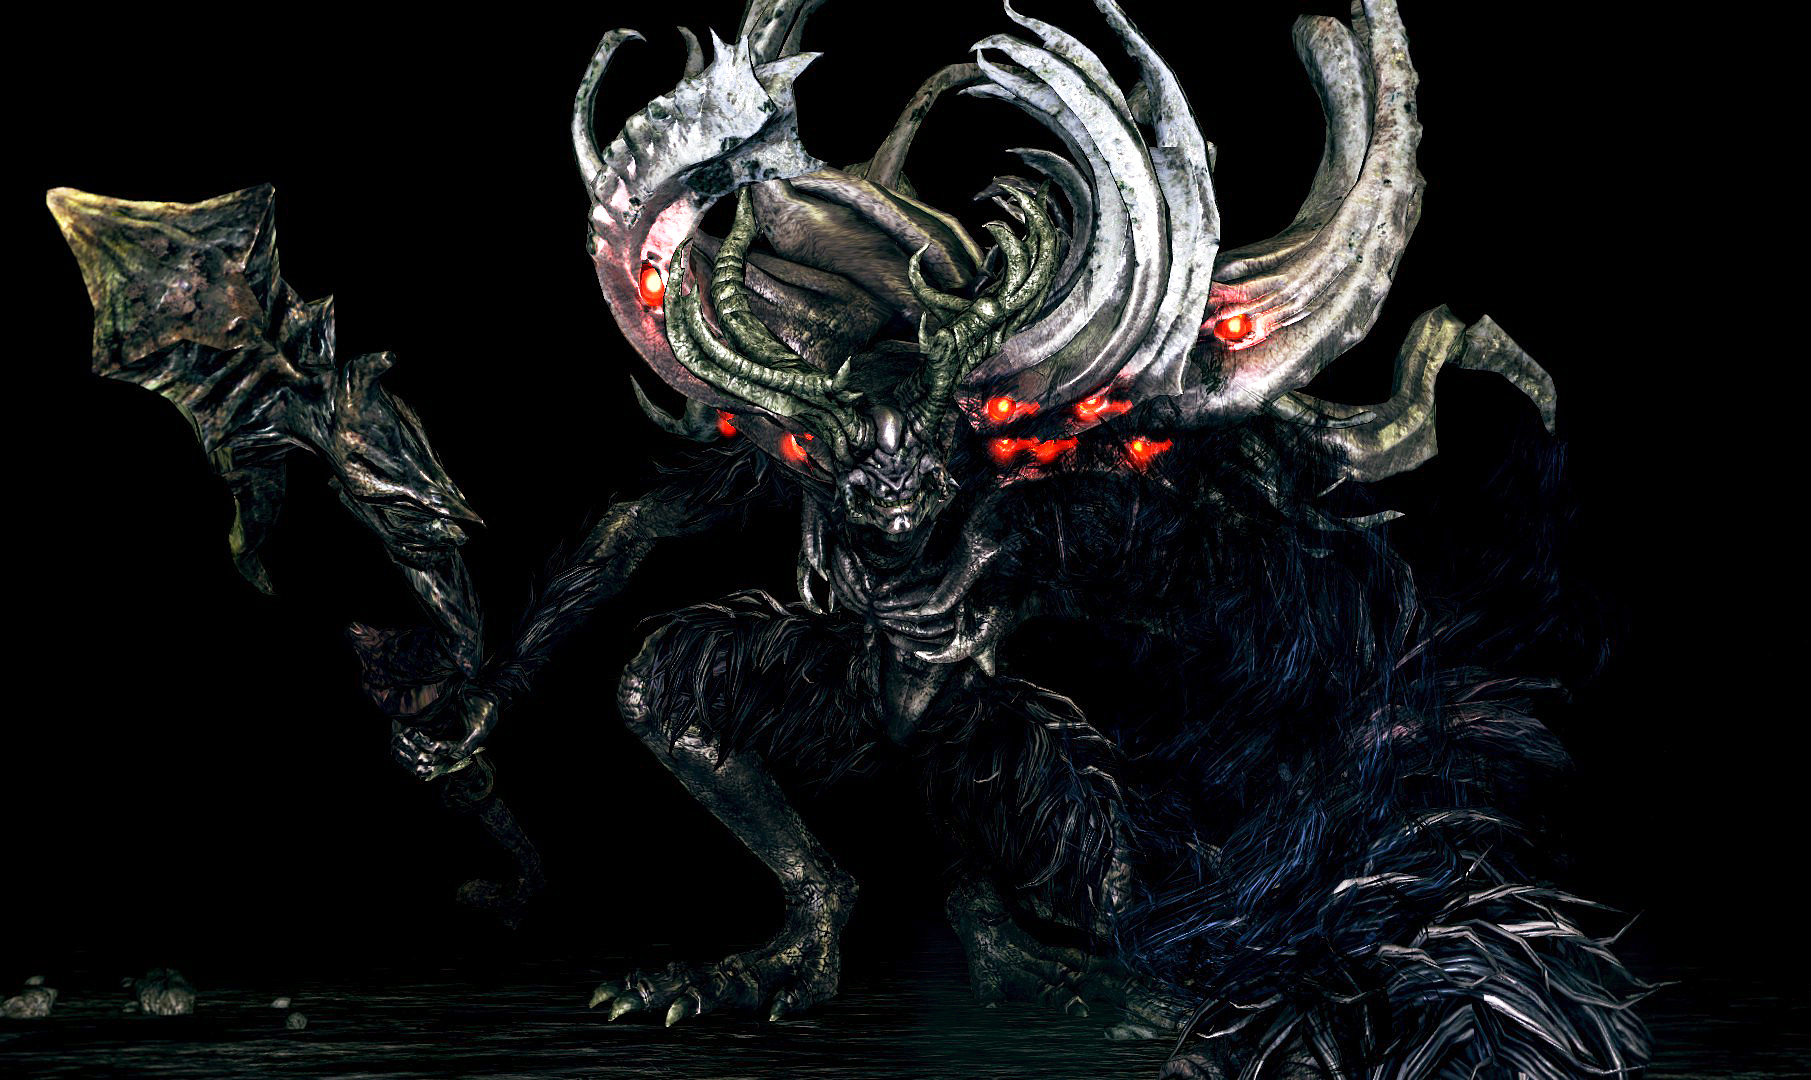
1. Manus, Father of the Abyss
Good luck with this guy.
Manus is the undisputed hardest boss in Dark Souls. He’s as fast as Artorias, as aggressive as Gwyn, has the health of Kalameet, and of course deals a ton of damage. You never feel safe in this fight; he has a bunch of sweeping attacks they make strafing hard, hits so hard your shield can barely block it, and has hit boxes so large that you have to dodge perfectly to not get clipped.
On top of all that, Manus barely leaves any openings for attacking or healing. Oh, and once he’s around 50% health he starts casting dark magic at you and all his magic attacks are nearly impossible to dodge! Because of this, I found this fight difficult to be patient with. The best advice I have is to two-hand your weapon and go for maximum damage when you can. If you’re too passive you’ll be spending most of your time looking for openings to heal.
“Git gud” doesn’t cut it for this boss—all I can say is good luck.
*Fun Fact: If you explored enough in the DLC, you might have found the Silver Pendant item. This pendant can actually block Manus’s dark magic attacks.

Eric Tate started playing video games back on the N64. His favorite franchises are The Legend of Zelda, Dark Souls, and Devil May Cry. Eric loves to play and write music and dreams of writing music for video games one day.